I was standing in my kitchen at 2 a.m., half‑asleep, staring at a lonely slice of cheese that had been left out on the counter for far too long. The fridge hummed like a lazy cat, and the only thing that could rescue that lonely dairy was a daring idea I’d never tried before: what if I wrapped that melty goodness in a warm, buttery tortilla and grilled it until the edges crackled like fireworks? I tossed a handful of cheddar and mozzarella together, slathered a tortilla with butter, and threw it onto a hot skillet. The sizzle that followed was nothing short of a love‑song for my ears, and the aroma—golden, buttery, with a hint of caramelized cheese—filled the whole apartment, making the neighbor’s cat stare through the window.
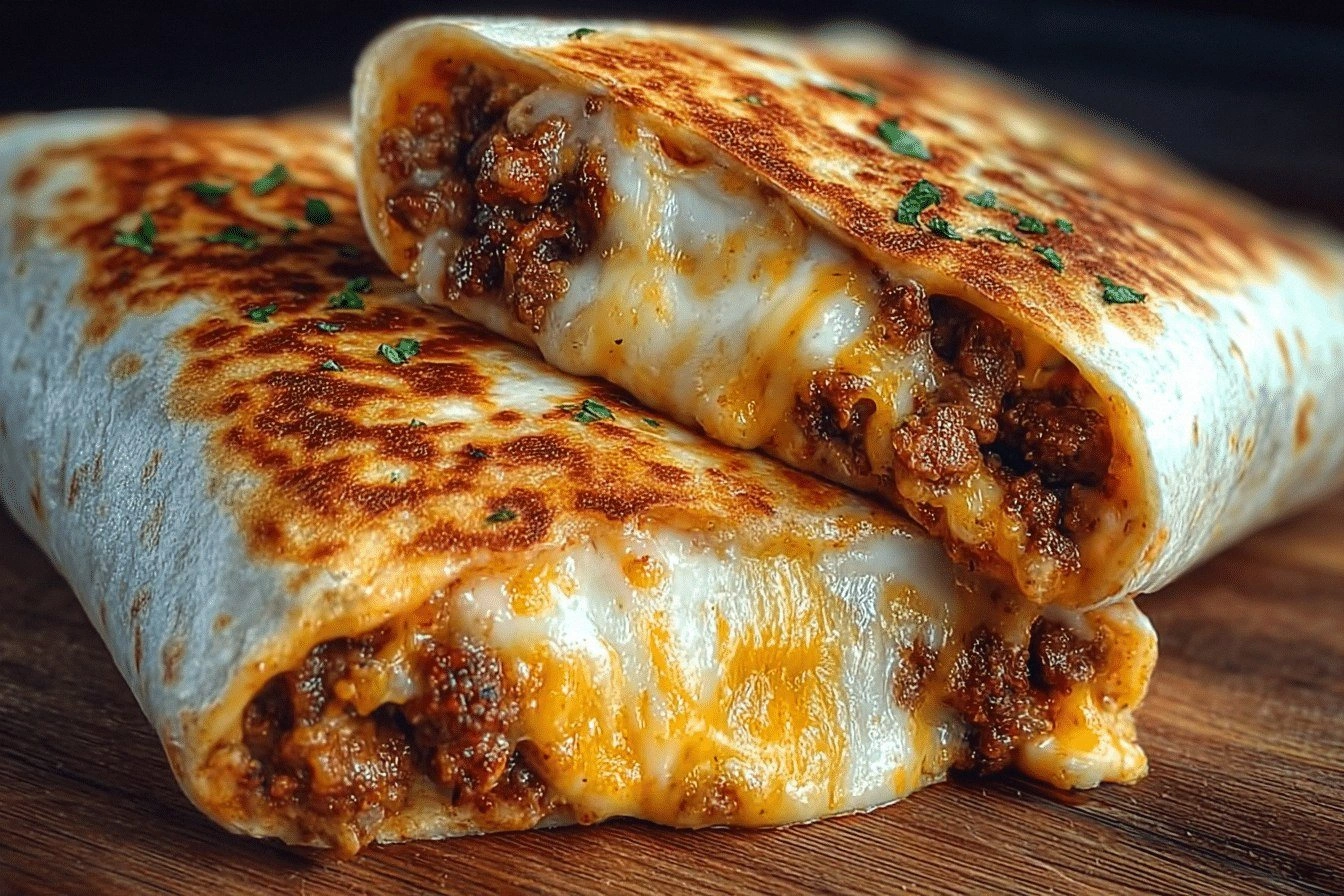
Fast forward to sunrise, and the whole kitchen smelled like a street‑food festival meets comfort‑food sanctuary. The first bite was a revelation: the outer crust was crisp enough to snap like thin ice, while the interior was a gooey, stringy river of cheese that stretched across the plate like a buttery highway. The tortilla stayed soft and pliable, hugging the cheese like a warm blanket, and a quick dash of salsa added a bright, tangy kick that made the whole thing sing. I swear, I dared you to taste this and not go back for seconds—because you won’t be able to.
Most grilled‑cheese‑burrito hybrids out there either drown in soggy dough or end up as a dry, rubbery mess that feels like chewing on a cardboard box. This version, however, is hands down the best you’ll ever make at home. The secret? A precise butter‑to‑tortilla ratio, a dual‑cheese blend that melts perfectly, and a quick sear that locks in moisture while creating that coveted golden crust. I’ll be honest—I ate half the batch before anyone else got a chance to try it, and that’s a confession I’m proud to make because the flavor is that addictive.
Okay, ready for the game‑changer? I’m about to walk you through every single step—by the end, you’ll wonder how you ever made a grilled cheese burrito any other way. Picture yourself pulling this out of the pan, the whole kitchen smelling incredible, the cheese stretching like a sunrise over a mountain range. Stay with me here — this is worth it.
What Makes This Version Stand Out
- Flavor Explosion: The marriage of sharp cheddar and mellow mozzarella creates a layered taste that’s both tangy and creamy, delivering a bite that feels like a celebration in your mouth.
- Texture Contrast: A buttery, crisp exterior gives way to a molten, stretchy interior—think of the crunch of a fresh tortilla chip meeting the silkiness of a cheese fondue.
- Simplicity: Only five core ingredients are needed, which means you can throw this together in under an hour without a pantry raid.
- Uniqueness: The technique of butter‑basting the tortilla before grilling creates a caramelized crust that most recipes completely miss.
- Crowd Reaction: Serve it at a casual dinner party and watch the “wow” factor skyrocket—people will line up for seconds, and you’ll be the hero of the night.
- Ingredient Quality: Using large flour tortillas ensures a soft bite while still holding up to the heat, and the combo of cheeses guarantees meltability without oiliness.
- Cooking Method: Grilling on a skillet gives you control over browning, unlike oven baking which can leave you guessing about the perfect crust.
- Make‑Ahead Potential: You can prep the fillings and cheese blend ahead of time, then assemble and grill fresh for a quick weeknight dinner.
Inside the Ingredient List
The Flavor Base
Tortillas are the canvas for this masterpiece. Large flour tortillas are chosen because they’re flexible enough to wrap around a generous amount of cheese without tearing, yet sturdy enough to hold up to the heat of the skillet. If you grab a tortilla that’s too thin, it will crack under the weight of the cheese, turning your burrito into a sad, broken mess. Look for a tortilla that has a slight yellow hue and a faint wheat scent—that’s a sign of good quality flour and a buttery flavor that will complement the cheese beautifully.
Cheese is where the magic truly happens. A blend of cheddar and mozzarella gives you the perfect balance: cheddar provides a sharp, tangy bite that cuts through the butter, while mozzarella offers that coveted stretch and melt. If you’re feeling adventurous, you can swap half the mozzarella for a smoked gouda for a subtle smokiness that adds depth. Skipping the cheese blend and using only one type will result in a one‑dimensional flavor profile that feels flat and unremarkable.
The Texture Crew
Butter is the unsung hero of any grilled masterpiece. It not only creates that golden‑brown crust but also infuses the tortilla with a rich, nutty flavor that you can’t achieve with oil alone. Use softened butter so it spreads easily; cold butter will clump and create uneven spots, while melted butter can make the tortilla soggy if you’re not careful. For a healthier twist, you can substitute half the butter with olive oil, but be prepared for a slightly different flavor profile.
Optional Fillings like sautéed veggies or meats add heartiness and texture. Think caramelized onions, bell peppers, or even shredded chicken that’s been seasoned with a pinch of cumin. These additions bring a satisfying bite and a burst of flavor that elevates the simple cheese‑tortilla combo into a full‑featured meal. If you skip them, you’ll still have a delicious snack, but you’ll miss out on the layered complexity that makes this burrito feel like a complete dinner.
The Unexpected Star
Salsa or hot sauce is the surprise guest that steals the show. A splash of bright, acidic salsa cuts through the richness of the cheese and butter, balancing the dish with a refreshing zing. If you love heat, a few dashes of hot sauce will add a fiery kick that makes each bite exciting. Leaving this out will result in a richer, more uniform flavor—still good, but lacking that exciting contrast that makes the palate dance.
The Final Flourish
When it comes to seasoning, a pinch of salt and a grind of fresh black pepper can make a world of difference. Salt amplifies the cheese’s natural flavor, while pepper adds a subtle warmth that rounds out the profile. If you’re watching sodium, you can use a low‑sodium cheese and skip the extra salt—just be aware that the overall taste will be milder. A final drizzle of olive oil after grilling can add a glossy finish and a hint of fruitiness that pairs beautifully with the buttered crust.
Everything’s prepped? Good. Let’s get into the real action…
The Method — Step by Step
-
Start by gathering all your ingredients on a clean countertop. Lay out the tortillas, shredded cheddar, shredded mozzarella, softened butter, optional fillings, and salsa in neat piles. This visual organization not only looks appealing but also prevents you from scrambling mid‑process, which is a common cause of kitchen mishaps. I dare you to keep everything within arm’s reach and watch how much smoother the cooking goes.
Kitchen Hack: Pre‑measure the cheese blend into a large bowl; this way you can quickly spoon it onto the tortilla without pausing to weigh each time. -
Heat a large non‑stick skillet over medium‑high heat. While it warms up, spread a thin, even layer of softened butter on one side of each tortilla using a pastry brush. The butter should coat the surface like a glossy veil, not pool in puddles—that’s the secret to a uniform golden crust. When the skillet is hot enough (a few drops of water should sizzle and dance), you’ll know it’s ready for the first tortilla.
-
Place the buttered side of the tortilla down onto the skillet, butter‑first, and let it sizzle for about 30 seconds. You’ll hear a gentle hissing that tells you the Maillard reaction has started, creating that irresistible nutty aroma. As the edges begin to lift, flip the tortilla gently with a spatula, exposing the un‑buttered side to the heat.
Watch Out: If the heat is too high, the butter will burn before the tortilla crisps, leaving a bitter taste. Keep the temperature steady and adjust as needed. -
Quickly sprinkle a generous handful of the cheddar‑mozzarella blend across the center of the tortilla, leaving about a one‑inch border all around. This border is crucial; it acts as a seal that prevents the cheese from spilling out when you fold the burrito. If you’re adding optional fillings, layer them on top of the cheese now, distributing evenly for balanced bites.
-
Fold the tortilla in half, then in half again to create a compact, triangular shape—think of a classic burrito but with a tighter seal. Press gently with the spatula to ensure the edges adhere, and let the cheese begin to melt inside the warm pocket. The moment the cheese starts to soften is when you’ll know you’re on the right track; it should give a faint, inviting aroma that fills the kitchen.
Kitchen Hack: Use a second spatula to press the folded edges together, creating a tighter seal and preventing cheese leaks. -
Allow the burrito to cook for another 2‑3 minutes on each side, flipping once, until the tortilla is a deep golden‑brown and the cheese is fully melted. You’ll see the edges start to pull away from the pan, a visual cue that the crust has formed properly. The cheese inside should be bubbling just beneath the surface, giving you that “cheese‑pull” moment that makes every foodie’s heart skip a beat.
-
While the burrito finishes its final crisp, warm your salsa or hot sauce in a tiny saucepan over low heat. This step isn’t mandatory, but a warm dip adds a comforting heat that melds with the cheese rather than sitting cold on the side. Stir occasionally, and add a pinch of salt if the salsa feels too acidic. The sauce should be just hot enough to steam, not boil.
-
Remove the burrito from the skillet and place it on a cutting board. Let it rest for about a minute; this short pause allows the cheese to set slightly, preventing a messy spill when you slice. Then, using a sharp chef’s knife, cut the burrito diagonally into two halves, exposing the molten interior like a work of art. The sight of that cheese stretch is pure, unadulterated joy.
-
Serve the halves immediately with a side of the warmed salsa or a drizzle of hot sauce. The first bite should deliver a crunch that shatters like thin ice, followed by a buttery, cheesy melt that coats your palate. If you’re feeling extra daring, add a squeeze of fresh lime juice on top for a bright, citrusy pop that lifts the entire flavor profile. That’s it — you did it. But hold on, I’ve got a few more tricks that’ll take this to another level…
Insider Tricks for Flawless Results
The Temperature Rule Nobody Follows
Most home cooks crank the heat up to “as hot as possible,” assuming faster cooking equals better results. In reality, a medium‑high setting (around 375°F on a stovetop) gives you that perfect golden crust without burning the butter. If the pan is too hot, the tortilla will scorch before the cheese melts, leading to a bitter bite. Keep a close eye on the sizzle; when it turns from a sharp hiss to a gentle pop, you’re in the sweet spot.
Why Your Nose Knows Best
Your sense of smell is a far more reliable indicator than a timer. When the butter begins to turn a light amber and you catch that nutty, toasted scent, you know the crust is forming. If you hear a faint crackle and smell a faint caramel note, that’s the moment to flip. Trusting your nose prevents over‑cooking and ensures every bite has that coveted crunch‑to‑melt ratio.
The 5‑Minute Rest That Changes Everything
After the burrito leaves the pan, give it a brief rest. Those five minutes allow the cheese fibers to re‑align, reducing the chance of a runaway cheese spill when you slice. It also lets the butter finish setting, so the outer crust stays crisp. Skipping this step is a common mistake that leads to a soggy exterior and a messy plate.
Butter‑Brush Technique for Even Gold
Instead of slathering butter with a spoon, use a pastry brush to apply a thin, even coat. This ensures every part of the tortilla gets a buttery kiss without excess pooling, which can cause uneven browning. If you’re in a hurry, a silicone brush works just as well and is easier to clean. The result is a uniform, glossy finish that looks as good as it tastes.
Salsa Warm‑Up for Flavor Fusion
Cold salsa can shock the molten cheese, creating a jarring temperature contrast that dulls the overall experience. Warm the salsa gently on the stove, or microwave for 15 seconds, to bring it to a temperature that complements the hot burrito. This small step makes the sauce meld into the cheese, creating a seamless flavor bridge rather than a cold interruption.
Creative Twists and Variations
This recipe is a playground. Here are some of my favorite ways to switch things up:
Spicy Chipotle Dream
Swap the regular salsa for a smoky chipotle sauce and add a handful of pickled jalapeños to the filling. The smoky heat pairs beautifully with the buttery tortilla, giving the burrito a bold, lingering kick that will make spice lovers swoon.
Mediterranean Magic
Replace cheddar with feta and mozzarella with goat cheese, then toss in sun‑dried tomatoes, olives, and a sprinkle of oregano. The tangy, salty notes create a Mediterranean vibe that feels like a quick trip to a seaside taverna.
Breakfast Boost
Add scrambled eggs, crumbled breakfast sausage, and a dash of hot sauce for a protein‑packed morning treat. The creamy egg yolk mixes with the cheese, creating a velvety interior that’s perfect for a lazy weekend brunch.
Veggie‑Lover’s Delight
Load the burrito with sautéed spinach, roasted red peppers, and caramelized onions. The veggies bring natural sweetness and a slight bitterness that balances the richness of the cheese and butter.
Sweet & Savory Fusion
For an adventurous palate, drizzle a thin layer of honey over the cheese before folding, and sprinkle a pinch of cinnamon. The sweet‑savory combo creates a dessert‑like twist that’s surprisingly addictive.
Storing and Bringing It Back to Life
Fridge Storage
Place any leftover burritos in an airtight container or wrap tightly in foil. They’ll keep fresh for up to three days. When you’re ready to eat, reheat in a skillet over medium heat for 2‑3 minutes per side; this restores the crisp exterior while keeping the interior melty.
Freezer Friendly
Wrap each burrito individually in parchment paper, then seal them in a freezer‑grade zip‑top bag. They’ll hold up for up to two months. To reheat, thaw overnight in the fridge, then grill in a hot pan for 4‑5 minutes per side, adding a splash of water (about a teaspoon) to the pan and covering for a minute to steam the interior back to perfection.
Best Reheating Method
The ultimate reheating hack is to use a preheated oven at 350°F for 10 minutes, but finish the last two minutes under the broiler to revive that golden crust. Add a tiny splash of water (just a few drops) to the pan before covering; the steam will melt the cheese without drying it out, delivering a freshly‑made experience.