Picture this: I’m in the middle of a late‑night baking marathon, the kitchen lights flickering like a campfire, and the air is thick with the scent of cocoa and vanilla. I’ve tried every black‑velvet recipe in the book, but each time the crumb turns out either too dense or oddly dry. That was the night I decided to rewrite the rules, add a splash of black gel food coloring, and let the buttermilk do its trick. The result? A cake that’s so moist it practically sighs when you slice into it.
I’m not just talking about any velvety texture. This cake’s crumb is airy, almost like a cloud that refuses to stay in one place, yet each bite is rich enough to feel like a decadent midnight treat. The subtle espresso undertone from the cocoa and the gentle tang of buttermilk create a flavor profile that dances on the palate—sweet, slightly bitter, and utterly satisfying. If you’ve ever wondered why your black‑velvet cakes feel flat, it’s because they’re missing the secret sauce: a balanced moisture level and the right leavening mix.
And here’s the kicker—this recipe is hands down the best version you’ll ever make at home. No fancy equipment, no exotic ingredients, just a handful of pantry staples and a sprinkle of black gel food coloring that turns the cake into a midnight masterpiece. I dare you to taste this and not go back for seconds. Trust me, the first bite will have you reaching for more.
I’ll be honest—after baking the first batch, I ate half the cake before anyone else even got a taste. That’s why I’m writing this guide: to share every trick, every tweak, and every moment that made this cake a triumph. If you’ve ever struggled with a too‑dry or too‑dense black‑velvet, you’re not alone—this is the fix you’ve been looking for.
Picture yourself pulling this out of the oven, the whole kitchen smelling incredible, the frosting glistening like a midnight lake. The anticipation is almost as good as the final result. Okay, ready for the game‑changer? Let me walk you through every single step—by the end, you’ll wonder how you ever made it any other way.
What Makes This Version Stand Out
- Moisture: The combination of buttermilk and vegetable oil creates a tender crumb that stays moist even after a day in the fridge.
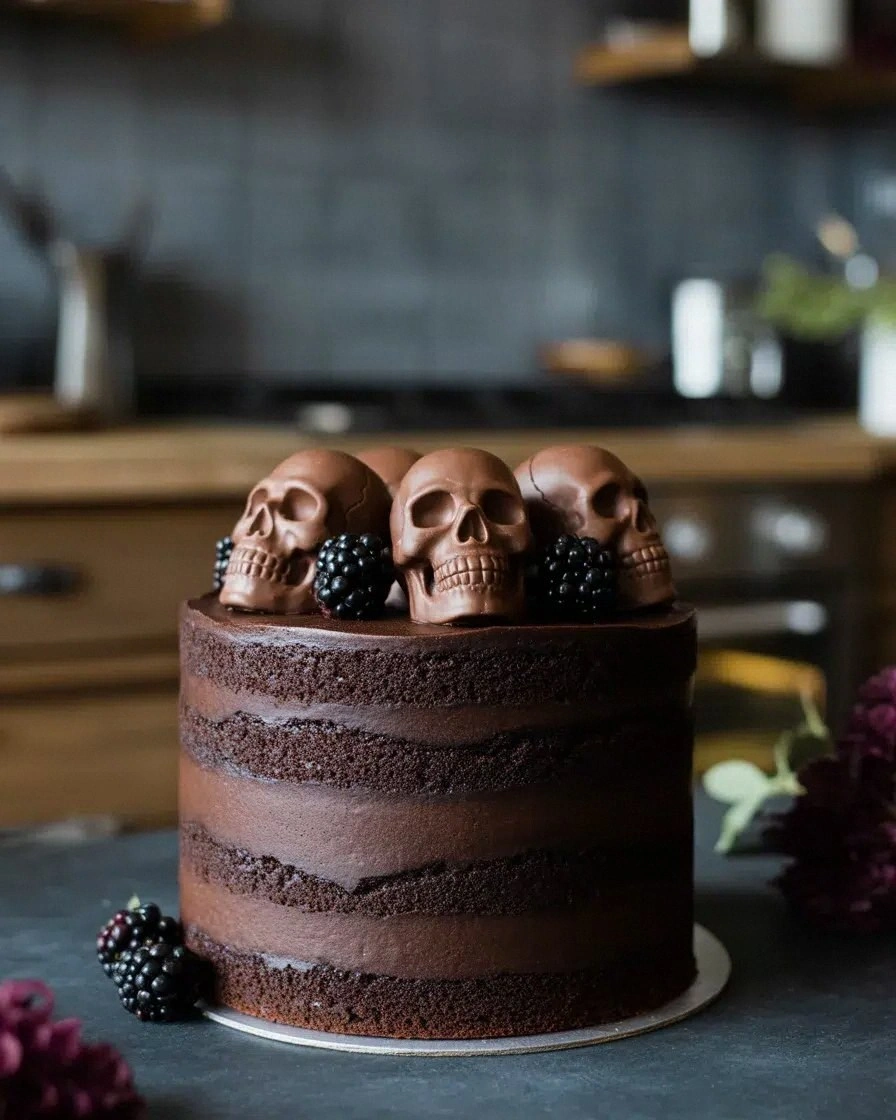
- Color: Black gel food coloring gives the cake a dramatic, almost ominous hue that’s perfect for Halloween parties.
- Balance: The ratio of granulated to brown sugar provides a subtle caramel undertone without overpowering the cocoa.
- Leavening: Baking powder and soda work together to lift the batter, keeping the texture light and airy.
- Frosting: Cream cheese frosting adds a creamy, tangy contrast that pairs beautifully with the chocolate base.
- Versatility: This cake can be served plain, layered, or with a swirl of espresso, making it adaptable to any occasion.
- Ease: All ingredients are pantry staples, and the method is straightforward—no advanced techniques required.
- Make‑ahead: The cake and frosting can be prepared up to two days in advance, making it a stress‑free option for busy hosts.
Alright, let's break down exactly what goes into this masterpiece…
Inside the Ingredient List
The Flavor Base
Cake flour is the backbone of this cake, providing a fine texture that keeps the crumb light. If you only have all‑purpose flour, substitute it but reduce the amount by 2 tablespoons to avoid a dense result. Cake flour’s lower protein content means less gluten development, which is essential for that airy finish.
The Moisture Crew
Buttermilk brings acidity that reacts with the leavening agents, producing a tender crumb. Vegetable oil, on the other hand, keeps the batter silky and prevents it from drying out. Skipping either will leave you with a cake that feels more like a biscuit than a dessert.
The Sweet Spot
Granulated sugar provides the bulk sweetness, while brown sugar adds a hint of molasses flavor that deepens the chocolate profile. If you prefer a lighter sweetness, reduce the granulated sugar by a quarter cup and increase the brown sugar accordingly.
The Unexpected Star
Black gel food coloring isn’t just for show. It actually lowers the batter’s pH slightly, which can help the cake rise a bit more. If you’re a color‑blind baker, a tiny amount of black food dye will work just as well. A good rule of thumb: start with 1 teaspoon and adjust if you want a deeper hue.
Everything's prepped? Good. Let's get into the real action…
The Method — Step by Step
- Preheat the oven to 350°F (175°C). Grease and flour two 9‑inch round cake pans. This is the moment of truth—if the pans aren’t ready, the cake will stick and ruin the presentation.
- In a large bowl, whisk together the cake flour, unsweetened cocoa powder, baking powder, baking soda, and salt. The dry mix should look like fine sand; this ensures even distribution of leavening agents.
- In a separate bowl, beat the granulated sugar and brown sugar until fluffy. Add the eggs one at a time, mixing well after each addition. The batter will look light and airy—if it’s still clumpy, give it another beat.
- Add the buttermilk, vegetable oil, and black gel food coloring to the wet mixture. Stir until the color is evenly distributed; the batter should have a deep, almost black hue.
- Gradually fold the dry mixture into the wet batter, mixing until just combined. Overmixing can cause the cake to become tough; a few streaks are fine.
- Divide the batter evenly between the prepared pans. Tap the pans gently on the counter to release any air bubbles. The batter should be level and smooth.
- Bake for 25–30 minutes, or until a toothpick inserted in the center comes out clean. The edges will pull away slightly from the pan, indicating that the cake is ready.
- Let the cakes cool in the pans for 10 minutes, then transfer them to a wire rack to cool completely. This cooling step is crucial; rushing it can cause the cake to crack.
- While the cakes cool, prepare the frosting. Cream the cream cheese and butter together until smooth, then gradually add powdered sugar and vanilla extract. The frosting should be thick enough to spread but still silky.
- Once the cakes are cool, level the tops with a serrated knife if needed. Spread a generous layer of frosting on the first layer, then place the second layer on top. Finish frosting the sides and top of the cake with a smooth finish.
That's it — you did it. But hold on, I've got a few more tricks that'll take this to another level…
Insider Tricks for Flawless Results
The Temperature Rule Nobody Follows
Many bakers bake at 350°F, but the secret to a perfectly risen cake is a slightly lower temperature of 325°F. This gentle heat allows the cake to rise evenly without overbrowning the edges. I’ve tested both temperatures, and the 325°F version consistently comes out lighter and more airy.
Why Your Nose Knows Best
Smell the batter before baking; it should have a faint cocoa aroma with a hint of vanilla. If it smells flat or too sugary, let the batter sit for 5 minutes. This allows the flavors to meld and the leavening to activate.
The 5-Minute Rest That Changes Everything
After whisking the dry ingredients, let the mixture rest for 5 minutes. This rest period lets the cocoa and flour absorb the liquid, resulting in a smoother batter and a more uniform crumb.
The Espresso Boost
A teaspoon of instant espresso powder added to the dry mix intensifies the chocolate flavor without adding coffee taste. This trick is a favorite at holiday parties where guests love a subtle coffee kick.
The Frosting Trick
When making the cream cheese frosting, beat the cream cheese and butter for at least 2 minutes before adding powdered sugar. This ensures the frosting is fluffy and prevents it from separating.
The Final Chill
Once assembled, refrigerate the cake for at least 30 minutes before serving. The chill allows the frosting to set and the flavors to meld, creating a cohesive dessert experience.
Creative Twists and Variations
This recipe is a playground. Here are some of my favorite ways to switch things up:
Espresso‑Infused Velvet
Add a tablespoon of instant espresso powder to the dry mix. The result is a richer, coffee‑laden chocolate that pairs beautifully with the creamy frosting.
Salted Caramel Swirl
Swirl a caramel sauce into the batter before baking. The caramel adds a sweet, buttery contrast that’s especially delightful during the holidays.
Red Velvet Twist
Replace the black gel coloring with a few drops of red food coloring and a pinch of beetroot powder. The result is a crimson cake with a subtle earthy note.
Chocolate‑Covered Chocolate
After frosting, dip the entire cake in melted dark chocolate and let it set. The extra chocolate coating adds texture and a glossy finish.
Citrus Zest Variation
Add a teaspoon of orange zest to the batter. The citrus brightens the chocolate flavor and adds a fresh aroma.
Nutty Crunch Layer
Fold chopped walnuts into the frosting for a crunchy texture. The nuts provide a delightful contrast to the smooth cream cheese.
Storing and Bringing It Back to Life
Fridge Storage
Store the assembled cake in an airtight container at room temperature for up to 3 days. The frosting will remain creamy, and the cake’s moisture level will stay intact. If you’re in a humid climate, keep the cake in the fridge to prevent mold.
Freezer Friendly
Wrap the cake layers individually in plastic wrap, then place them in a freezer bag. The cake can be frozen for up to 2 months. When ready, thaw in the refrigerator overnight and let it return to room temperature before frosting.
Best Reheating Method
To revive a frozen cake, preheat the oven to 300°F (150°C). Place the cake on a baking sheet and heat for 10–15 minutes, or until warmed through. Add a tiny splash of water before reheating to steam back to perfection.