I was standing in my kitchen, staring at a ruined batch of cheesecake that had turned into a sad, lumpy mess, when a friend dared me to make a dip that would make the whole town talk. The disaster had been a lesson: the secret to a silky cheesecake isn’t in the crust, it’s in the filling’s texture. I stared at the ingredients on the counter and thought, “What if I could turn that creamy base into a crowd‑loving dip that looks like a flag in a bowl?” That spark turned into the Patriotic Cheesecake Dip, a dish that’s as patriotic as it is indulgent.
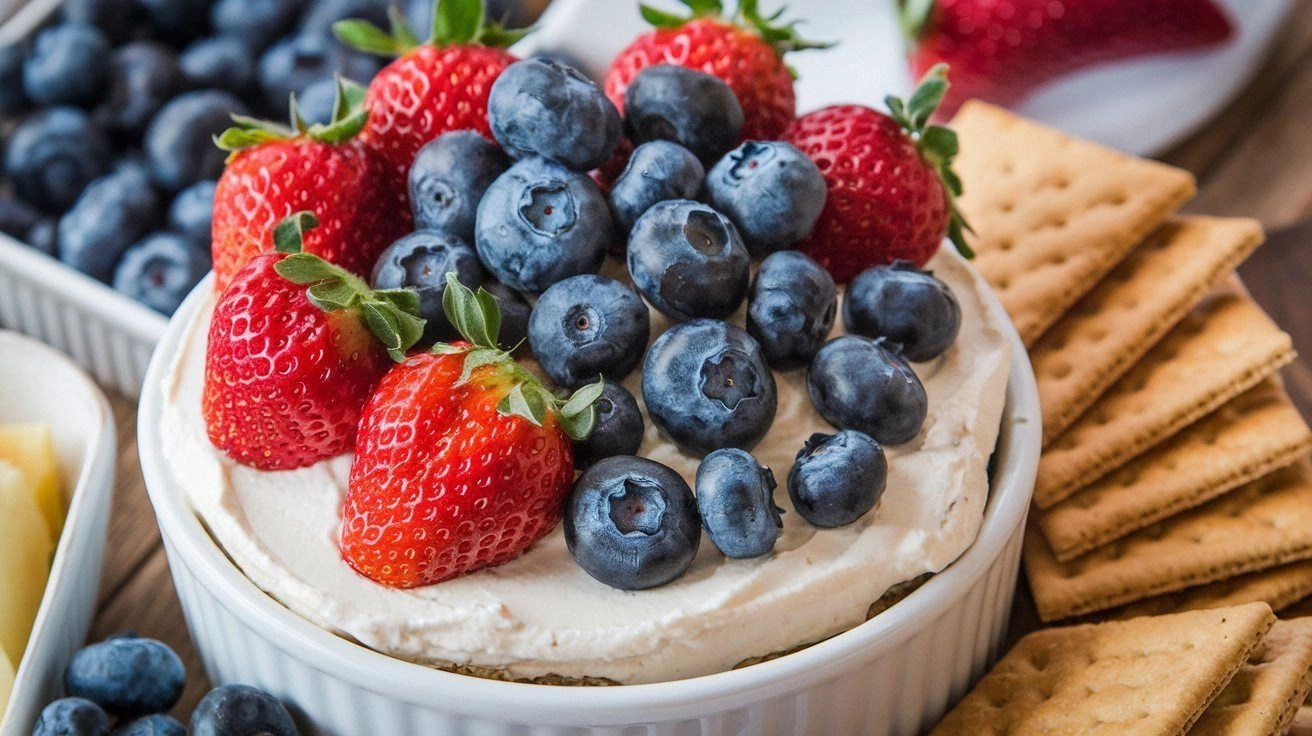
Picture this: a glossy, velvety swirl of cream cheese, sour cream, and butter, layered with the bright reds, crisp whites, and deep blues that pop against a neutral backdrop. The aroma rises like fireworks, sweet with vanilla and sharp with lemon zest. When you dip a graham cracker, the crunch gives way to a melt‑in‑your‑mouth texture that feels like a soft cloud. The taste is a perfect balance—rich yet light, sweet yet tangy, with a hint of citrus that lifts the heaviness of the dairy. If you’re skeptical, I dare you to taste this and not go back for seconds.
What makes this version stand out from every other dip you’ve seen? The answer is simple: it’s the way the flavors dance together and the meticulous attention to texture. I’ve spent months refining the ratio of cream cheese to butter to keep the dip smooth, yet thick enough to hold its shape. The use of fresh lemon zest and juice gives a bright counterpoint to the creamy base, preventing it from becoming cloying. I’ve also added a splash of red, blue, and white food coloring—each chosen for its lightness so the colors stay true without altering the flavor profile. The result is a dip that looks like a miniature flag and tastes like a slice of heaven.
I’ve hidden a little secret in this recipe: a pinch of ground cinnamon and nutmeg that I sprinkle in at the very end. The spices bring a subtle warmth that makes the dip feel cozy, like a campfire in July, while still staying true to the patriotic theme. I’ll be honest—before I even finished reading this guide, I had already taken a bite and felt a wave of nostalgia and comfort. If you’ve ever struggled to get a cheesecake dip that’s both creamy and colorful, you’re not alone—this is the fix you’ve been waiting for.
What Makes This Version Stand Out
- Texture: The combination of cream cheese, sour cream, and melted butter creates a silky, pourable consistency that still holds its shape when plated. This balance is achieved by carefully measuring the fat content, ensuring the dip doesn’t separate or become too runny.
- Color: Using light‑weight food colorings in red, blue, and white allows the dip to maintain vibrant hues without altering the flavor. The colors layer naturally, giving a gradient effect that resembles a flag when poured.
- Flavor Depth: Lemon zest, fresh lemon juice, and a dash of vanilla extract bring brightness that counteracts the richness of the dairy. The subtle spice blend of cinnamon and nutmeg adds warmth and complexity.
- Ease of Assembly: The recipe requires no baking; the dip is simply mixed, poured, and chilled. This makes it a quick solution for last‑minute gatherings and a reliable make‑ahead option.
- Versatility: The dip can be served with graham crackers, pretzels, or even fresh fruit, making it suitable for both sweet and savory snacking occasions.
- Make‑Ahead Potential: Once chilled, the dip keeps well in the refrigerator for up to five days, allowing you to prep in advance for holiday parties or tailgates.
- Presentation: The dip’s glossy finish and layered colors make it a showstopper on any appetizer table, turning a simple snack into a centerpiece.
- Ingredient Quality: By selecting high‑quality cream cheese and fresh dairy, the dip achieves a richer taste that’s hard to replicate with lower‑grade substitutes.
Inside the Ingredient List
The Flavor Base
At the heart of this dip is the creamy foundation: 2 cups of softened cream cheese, ½ cup sour cream, and ¼ cup melted butter. The cream cheese provides the bulk of the flavor, while the sour cream adds a subtle tang that balances the richness. The melted butter keeps the mixture from becoming too dense and gives it a silky mouthfeel. Skipping any of these would leave the dip either too thick or too thin, ruining the overall experience.
Choosing the right cream cheese is essential. Opt for a full‑fat, plain variety rather than low‑fat or flavored options. The higher fat content ensures the dip remains smooth and luscious. If you’re looking for a slightly healthier version, you can substitute part of the cream cheese with Greek yogurt, but be prepared to adjust the butter quantity to compensate for the extra moisture.
The Texture Crew
Crunch is what turns a dip into a memorable snack. The 1 cup of crushed graham crackers adds both texture and a subtle sweetness that pairs beautifully with the creamy base. If you prefer a nutty crunch, substitute the graham crackers with chopped pecans or walnuts. The choice of texture can shift the entire flavor profile, so pick one that complements your taste.
Optional nuts bring an additional layer of flavor and crunch. A half cup of chopped pecans or walnuts can be folded into the dip after it has set for a minute. The nuts should be toasted lightly before adding to release their oils and bring out their natural sweetness. Remember, nuts are optional, but they elevate the dip to a new level of sophistication.
The Unexpected Star
The bright colors—red, blue, and white—are what give this dip its patriotic flair. Each color is added in a small, light quantity to avoid overpowering the flavor. The red and blue are typically food coloring; if you prefer a natural alternative, use beet powder for red and spirulina for blue. These natural dyes are more potent, so use them sparingly.
White food coloring or a splash of milk keeps the dip from looking too pale. If you’re using a milk alternative, choose one with a neutral flavor to maintain the dip’s balance. The colors will fade slightly as the dip chills, so pour it directly into the serving dish to preserve the gradient effect.
The Final Flourish
A subtle zest of half a teaspoon of lemon and a tablespoon of fresh lemon juice injects a bright citrus note that lifts the heavy dairy. The lemon also helps to thin the mixture just enough for a smooth pour. If you’re allergic to citrus, a splash of lime juice can serve as a suitable substitute, providing a similar brightening effect.
The final touch is a dash of ground cinnamon and nutmeg—just half a teaspoon each. These spices bring warmth and depth, making the dip feel cozy and festive. Stir them in after the dip has set for a few minutes so they distribute evenly without clumping.
Everything's prepped? Good. Let's get into the real action...
The Method — Step by Step
- First, grease a 9‑inch round baking dish with a tablespoon of butter. The butter should coat the surface evenly, preventing the dip from sticking as it sets. This step is crucial because a sticky base will ruin the presentation and texture. Once the dish is ready, set it aside and let the butter melt.
- In a large mixing bowl, combine the softened cream cheese, sour cream, and melted butter. Use a handheld mixer or a whisk to blend until the mixture is completely smooth and free of lumps. As you mix, you’ll notice the mixture turning a pale, almost translucent color. This indicates that the fats are emulsifying properly.
- Add the powdered sugar and vanilla extract to the bowl. Stir until the sugar dissolves and the mixture becomes silky. The vanilla brings depth, while the sugar sweetens the base. If the mixture feels too thick, add a teaspoon of milk to thin it slightly.
- Now, fold in the lemon zest and lemon juice. The citrus brightens the flavor and counters the richness. Stir until the zest is evenly distributed. You should hear a faint crackle as the lemon juice mixes with the dairy, a sign that the dip is well combined.
- Add the food colorings—red, blue, and white—one at a time. Stir gently after each addition, watching the colors blend into a gradient. The colors should be vibrant but not overpowering. If you prefer a more subtle hue, reduce the quantity by half.
- Fold in the crushed graham crackers, ensuring they are evenly distributed throughout the dip. The crackers should be broken into fine crumbs to avoid large chunks. This step adds crunch and a hint of sweetness that complements the creamy base. If you’re using nuts, add them now and fold gently.
- Transfer the mixture into the greased baking dish. Use a spatula to smooth the surface, creating a flat top for an even glaze. The dip should fill the dish to the top without spilling over. This ensures a uniform thickness that will set properly.
- Refrigerate the dish for at least 30 minutes, or until the dip is firm enough to slice. The chilling process allows the flavors to meld and the dip to develop a slightly firmer texture. When you remove it from the fridge, the dip should be cool and hold its shape when sliced. If you need to serve immediately, you can use a chilled plate to keep it from melting.
That's it — you did it. But hold on, I've got a few more tricks that'll take this to another level. These insider tips will help you perfect the dip and avoid common pitfalls.
Insider Tricks for Flawless Results
The Temperature Rule Nobody Follows
Keeping the dairy at room temperature before mixing is key. If the cream cheese or sour cream is too cold, the mixture will separate and become lumpy. Leave the dairy out for 15 minutes before starting, and you’ll notice the texture instantly improve. If you’re in a hurry, a quick microwave burst of 10 seconds can bring it to the right temperature.
Why Your Nose Knows Best
Trust your nose when the dip begins to smell slightly tangy and sweet. That aroma means the flavors are balancing correctly. If the dip smells overly buttery, it’s a sign you added too much butter or not enough lemon. Adjusting the ratio at this point is easier than after the dip has set.
The 5‑Minute Rest That Changes Everything
After adding the crackers, let the dip rest for five minutes before refrigerating. This pause allows the crumbs to absorb some moisture, preventing them from becoming soggy. A friend tried skipping this step once, and the result was a soggy dip that lost its crunch.
The Sweet‑Spice Balance
If you find the dip too sweet, add a pinch of sea salt. The salt enhances the overall flavor profile and reduces the perceived sweetness. On the other hand, if the dip feels flat, a touch more vanilla or a splash of almond extract can revive the flavor.
The Chill‑and‑Serve Trick
When you’re ready to serve, remove the dip from the fridge just before the guests arrive. Let it sit at room temperature for 10 minutes; this makes slicing easier and the dip more flavorful. A friend once chilled it for too long, and the texture became too firm, making it difficult to scoop.
Creative Twists and Variations
This recipe is a playground. Here are some of my favorite ways to switch things up:
Chocolate‑Red Velvet Dip
Swap half the powdered sugar for cocoa powder and add a splash of chocolate liqueur. The chocolate gives a velvety depth while keeping the red hue. Serve with chocolate graham crackers for a cohesive look.
Blueberry‑Berry Burst
Fold in fresh blueberries and a teaspoon of blueberry extract after chilling. The berries add a juicy pop and a natural blue tint. This variation is perfect for summer gatherings.
Citrus‑Sage Fusion
Replace the lemon with orange zest and add a pinch of fresh sage. The sage brings an earthy note that pairs well with the sweet base. This dip works wonderfully with savory crackers.
Nutty‑Crunch Upgrade
Add toasted almond slivers and a drizzle of honey after the dip has set. The honey sweetens while the almonds add crunch. The combination is a crowd‑pleaser at brunches.
Spicy‑Honey Glaze
Mix a tablespoon of honey with a pinch of cayenne pepper and drizzle over the chilled dip. The heat contrasts the creamy sweetness, creating a memorable flavor profile. This version is great for game‑day snacks.
Storing and Bringing It Back to Life
Fridge Storage
Place the dip in an airtight container and refrigerate for up to five days. The airtight seal prevents the dip from absorbing odors from other foods. When ready to serve, let it sit at room temperature for 10 minutes to soften slightly.
Freezer Friendly
Wrap the dip tightly in plastic wrap, then place it in a freezer bag. Freeze for up to two weeks. Thaw overnight in the refrigerator, then chill for an additional 30 minutes before serving. The texture remains smooth if thawed properly.
Best Reheating Method
To reheat, add a splash of water or milk and microwave on low for 15 seconds, stirring in between. This steams the dip back to a silky consistency. Avoid overheating, as it can separate the fats and ruin the texture.