I remember the night I nearly burned the kitchen down while trying to make a simple chocolate cookie. The oven was set too high, the dough was too wet, and the result was a sad, soggy mess that tasted like melted butter and disappointment. That disaster became the catalyst for a quest to create a cookie that would not only taste like a chocolate‑peanut dream but also be a masterpiece of texture and flavor. I spent weeks tweaking ratios, testing different flours, and experimenting with the timing of each ingredient. The end result? A cookie that melts in your mouth, releases a molten chocolate river, and leaves a crunchy, nutty crunch that lingers like a secret whisper.
Picture this: the kitchen is humming with the low buzz of the mixer, the air is thick with the aroma of cocoa and roasted peanuts, and you see a mound of dough that glistens like a dark, buttery gem. As you stir, the sound of chocolate chips clinking against the bowl is almost musical. When the first cookie hits the hot pan, a faint hiss signals the start of caramelization, and the edges begin to crisp like the crack of a shell. The first bite is a symphony—sweet, salty, creamy, and a hint of roasted nuts that gives the cookie depth. The texture is a paradox: the exterior is crisp, the interior is gooey, and the peanut butter adds a silky, buttery center that feels like a secret portal to chocolate bliss.
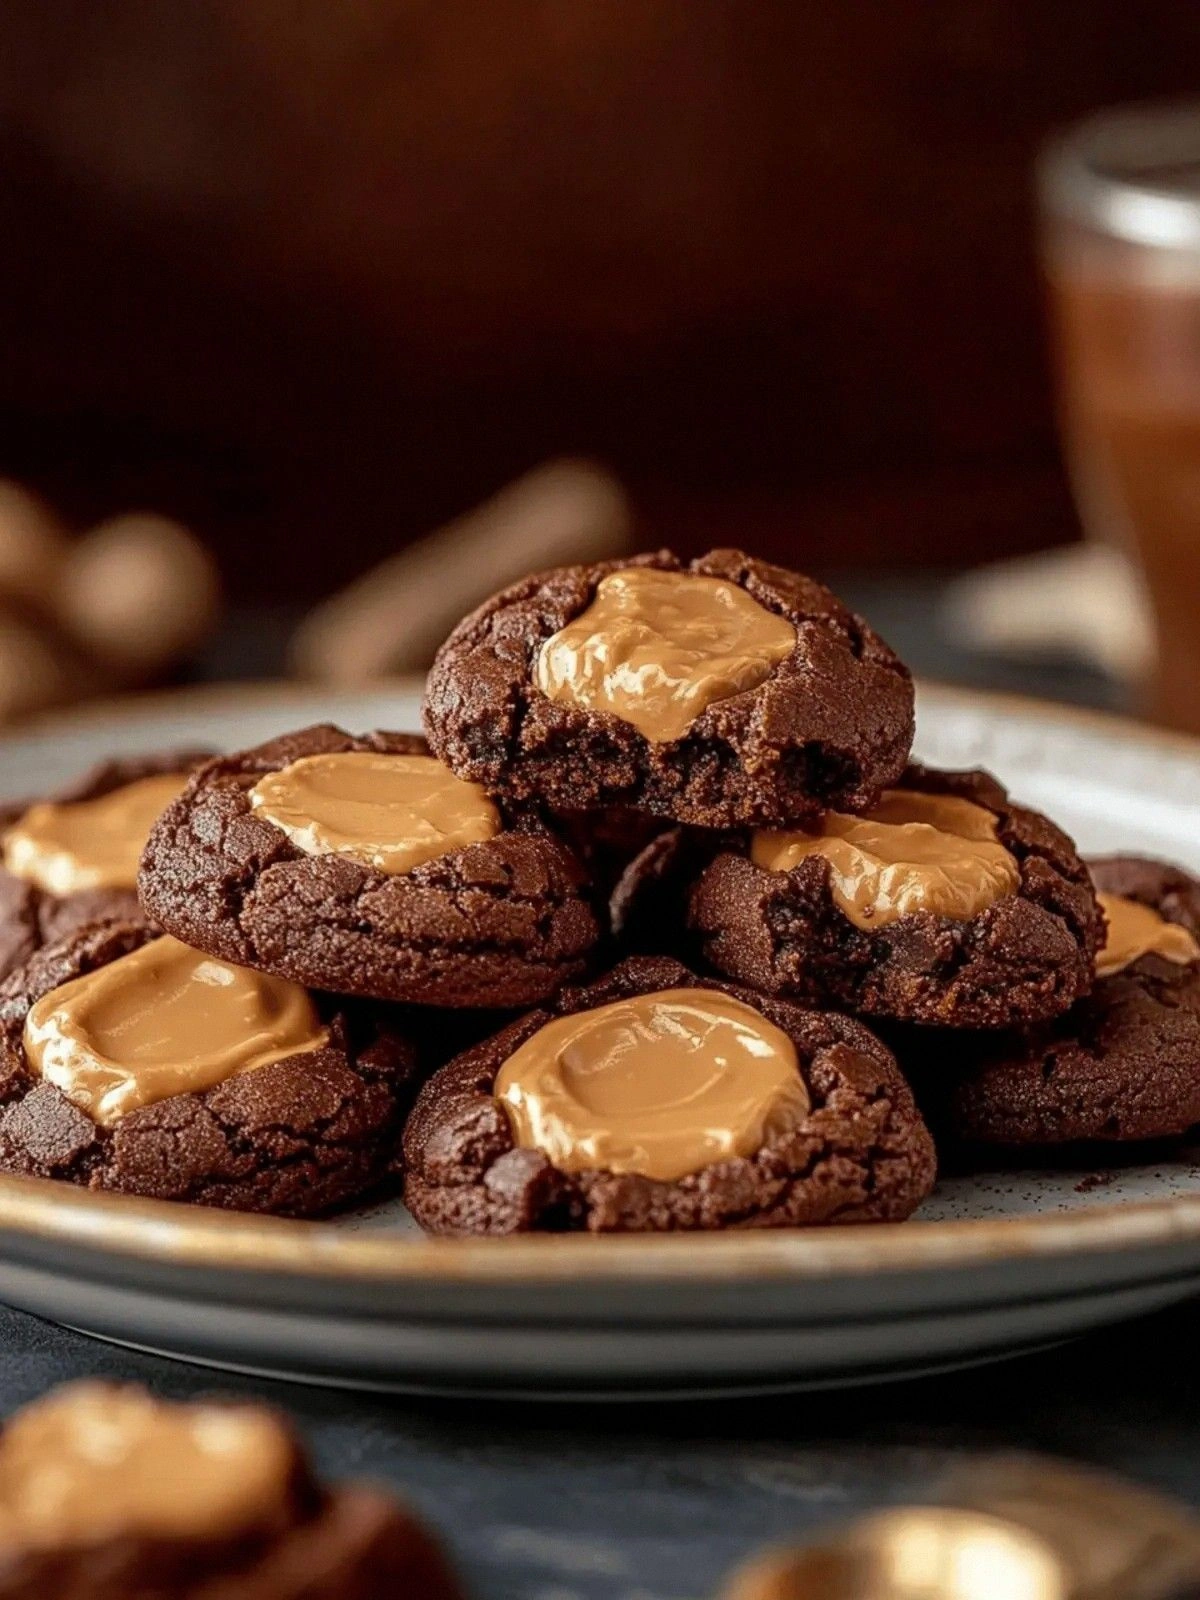
What sets this version apart from the countless other chocolate peanut recipes you’ll find online is the careful balance of moisture and crunch. I discovered that using a combination of granulated and brown sugar gives the dough a subtle caramel undertone while keeping it tender. The peanut butter is spread thinly on top before baking, which creates a glossy, caramelized layer that melts into the chocolate inside. The chocolate chips are high‑quality dark chocolate that add a bittersweet edge, and a pinch of sea salt flakes on top gives a final pop of flavor that lingers long after you finish the cookie. And let’s be honest—most recipes get this completely wrong. Here’s what actually works.
If you’ve ever struggled with cookies that either dry out or become too doughy, you’re not alone. I’ve seen many people toss the dough into the pan with a spoon, only to end up with a lumpy mess that looks more like a brownie than a cookie. The secret is in the technique: gently forming the dough into small, even balls, and letting them rest before baking. This small step ensures each cookie cooks evenly, achieving that perfect combination of crisp edges and a molten center. I dare you to taste this and not go back for seconds. This is hands down the best version you’ll ever make at home.
Let me walk you through every single step—by the end, you’ll wonder how you ever made it any other way. From the first whisk to the final dusting of sea salt, I’ll share the little tricks that transform an ordinary cookie into a culinary triumph. And trust me, the next part? Pure magic.
What Makes This Version Stand Out
- Flavor: The combination of cocoa, peanut butter, and sea salt creates a layered taste profile that feels both indulgent and sophisticated.
- Texture: Crisp edges give way to a gooey, molten chocolate center that practically drips when you cut into it.
- Simplicity: With only a handful of pantry staples, you can whip up a decadent treat without the need for fancy equipment.
- Ingredient Quality: Using high‑quality dark chocolate and natural peanut butter elevates the flavor beyond the average cookie.
- Make‑Ahead Potential: The dough can be refrigerated for up to 48 hours, making it a convenient option for parties or last‑minute dessert plans.
- Crowd Reaction: These cookies are guaranteed to be the highlight of any gathering, with guests begging for a second bite.
- Versatility: Add nuts, dried fruit, or a splash of espresso to customize the flavor for any occasion.
- Presentation: The glossy peanut butter glaze and sea salt flakes make for a stunning visual appeal that will wow your Instagram feed.
Alright, let's break down exactly what goes into this masterpiece…
Inside the Ingredient List
The Flavor Base
Cocoa powder is the backbone of any chocolate cookie. It not only provides the deep, rich chocolate flavor but also gives the dough a dark, almost velvety color that looks as good as it tastes. When you use a high‑quality unsweetened cocoa, you’re also adding a subtle bitterness that balances the sweetness from the sugars. Skipping cocoa would turn your cookie into a plain chocolate cookie that lacks depth and character.
The combination of granulated and brown sugar creates a caramelized undertone. Granulated sugar dissolves quickly, ensuring a smooth dough, while brown sugar adds moisture and a hint of molasses flavor. If you’re allergic to sugar or want a lower‑calorie version, you can replace the granulated sugar with a natural sweetener like maple syrup, but keep the brown sugar to maintain texture.
The Texture Crew
All‑purpose flour is the foundation that gives the cookie structure. It keeps the dough from collapsing while still allowing it to spread slightly for that classic cookie shape. If you want a gluten‑free version, try a blend of rice flour and tapioca starch, but remember to add a pinch of xanthan gum to maintain elasticity.
Butter—or vegan butter—provides richness, flavor, and a tender crumb. The fat coats the flour particles, preventing gluten development and keeping the cookie light. For a dairy‑free alternative, coconut oil or a plant‑based butter works well, though the flavor profile will shift slightly toward coconut.
The Unexpected Star
Peanut butter is the secret weapon that gives these cookies their signature gooey center. The natural oils in peanut butter melt during baking, creating a liquid chocolate river that swirls when you bite. If you’re a fan of almond butter, swap it in for a nutty twist, but be aware that almond butter has a higher oil content, which may affect the dough’s consistency.
Chocolate chips or chunks are the ultimate indulgence. Choose high‑quality dark chocolate for a richer taste, or add milk chocolate for a sweeter, creamier finish. If you’re looking for a low‑sugar option, look for sugar‑free chocolate or use a blend of dark and white chocolate for a balanced flavor.
The Final Flourish
Chopped nuts add a satisfying crunch that contrasts with the gooey center. They also provide an extra layer of flavor—whether you choose walnuts, pecans, or almonds. If you’re a fan of a bit of heat, sprinkle some crushed red pepper flakes before baking to give the cookies a subtle kick.
Sea salt flakes are the finishing touch that elevates the overall taste. A light dusting of sea salt on top after baking brings out the sweetness of the chocolate and the richness of the peanut butter, creating a harmonious balance. Skip the salt and you’ll end up with a cookie that tastes flat and uninspired.
Everything's prepped? Good. Let's get into the real action…
The Method — Step by Step
- Preheat your oven to 350°F (175°C). Line a baking sheet with parchment paper. This temperature is crucial for achieving the right balance between a crisp exterior and a molten center.
- In a medium bowl, sift together the all‑purpose flour, cocoa powder, and salt. Sifting removes lumps and ensures an even distribution of cocoa, which gives the cookie its deep chocolate hue.
- In a separate bowl, cream the butter with granulated sugar and brown sugar until light and fluffy. The goal is to incorporate air, which will make the cookies lighter. If you’re using vegan butter, let it soften to room temperature before creaming.
- Add the eggs one at a time, beating well after each addition. The eggs bind the dough and provide structure. If you’re using flax eggs, whisk 1 tablespoon of ground flaxseed with 3 tablespoons of water until it thickens.
- Stir in the peanut butter until fully incorporated. The peanut butter should be at room temperature to prevent lumps. This step creates the gooey center that will melt when baked.
- Gradually fold in the dry ingredients, mixing until just combined. Over‑mixing can develop gluten, leading to a tough cookie. The dough should be thick but spreadable.
- Fold in the chocolate chips or chunks, then gently stir in the chopped nuts. The nuts should be evenly distributed to avoid clumping. This step adds a satisfying crunch and a nutty aroma.
- Drop tablespoon‑sized dough balls onto the prepared baking sheet, spacing them about 2 inches apart. Gently press each ball to flatten slightly. The shape will determine the final texture—more flattened for crispier edges.
- Bake for 10–12 minutes, until the edges are set but the centers still look slightly undercooked. This is the moment of truth; the cookies should smell toasty and the chocolate should start to melt.
- Remove from the oven and let the cookies cool on the sheet for 5 minutes. The residual heat will finish the cooking process and set the gooey center. Then transfer them to a wire rack to cool completely.
That's it — you did it. But hold on, I've got a few more tricks that'll take this to another level. Trust me, these adjustments will elevate the flavor and texture, turning a great cookie into an unforgettable experience.
Insider Tricks for Flawless Results
The Temperature Rule Nobody Follows
Many bakers bake at 375°F, but lowering the temperature to 350°F allows the cookies to bake more evenly. At the lower temperature, the edges set slowly, giving the center time to develop that coveted molten chocolate. If you’re in a hurry, you can increase the temperature to 400°F, but you’ll need to reduce the bake time by 2–3 minutes to avoid overcooking.
Why Your Nose Knows Best
The aroma of baking chocolate is a reliable indicator of doneness. When the cookies start to emit a sweet, nutty scent, they’re almost ready. This is the moment to pull them out, as the residual heat will finish the job. If you’re unsure, give them a gentle press; the center should feel slightly soft but not liquid.
The 5‑Minute Rest That Changes Everything
After removing the cookies from the oven, let them rest on the sheet for 5 minutes before transferring to a wire rack. This short rest allows the cookies to set and prevents them from breaking apart. A friend once tried skipping this step, and the cookies collapsed into a sticky mess.
Add a Splash of Water Before Reheating
If you’re reheating leftover cookies, drizzle a tiny splash of water over the top and place them in a microwave for 15–20 seconds. The water steams the cookies, bringing back that moist, gooey center without drying them out.
Use a Light Dusting of Sea Salt After Baking
Sea salt flakes are more than a garnish—they’re a flavor enhancer. Sprinkle a light dusting immediately after baking to lock in the moisture and intensify the chocolate flavor. This simple step is often overlooked but makes a significant difference.
Creative Twists and Variations
This recipe is a playground. Here are some of my favorite ways to switch things up:
Espresso Infusion
Add 1 teaspoon of instant espresso powder to the dry ingredients. The espresso intensifies the chocolate flavor and adds a subtle bitterness that balances the sweetness.
Minty Madness
Fold in 1 tablespoon of peppermint extract into the wet mixture. The mint provides a refreshing contrast to the rich chocolate and peanut butter, making it perfect for summer gatherings.
Caramel Crunch
Swap the chocolate chips for caramel bits and sprinkle a pinch of sea salt on top. The result is a sweet‑salty, caramel‑filled cookie with a buttery crunch.
Spiced Delight
Add 1/4 teaspoon of cinnamon and a pinch of nutmeg to the dry mix. The warm spices complement the chocolate and peanut butter, creating a cozy, autumnal flavor profile.
Almond Bliss
Replace peanut butter with almond butter and use sliced almonds instead of chopped nuts. The almond butter gives a subtle nutty sweetness, and the almonds add a pleasant crunch.
Chocolate‑Covered Surprise
After baking, dip half of each cookie in melted dark chocolate, then let them set on parchment. This adds a glossy, chocolatey coating that turns each cookie into a chocolate‑covered masterpiece.
Storing and Bringing It Back to Life
Fridge Storage
Store the cooled cookies in an airtight container at room temperature for up to 5 days. For longer freshness, keep them in the refrigerator; the chocolate will stay firm, and the peanut butter center will remain creamy.
Freezer Friendly
Place the cookies in a freezer‑proof bag, pressing out as much air as possible. Freeze for up to 3 months. When ready to enjoy, let them thaw at room temperature for 20 minutes before serving.
Best Reheating Method
To revive frozen or stale cookies, warm them in a preheated oven at 300°F (150°C) for 8–10 minutes. Alternatively, microwave on medium power for 15–20 seconds. The key is to warm them just enough to soften the center without melting the chocolate.