Remember that night when the kitchen smelled like burnt sugar and I stared at a half‑baked batch of what I thought was shortbread? I was halfway to giving up, but a stubborn craving for buttery perfection pushed me to tweak the recipe until the dough sang. I added a splash of cornstarch and a pinch of vanilla, and the result was a crumb that melted like a warm blanket on a cold winter evening. That moment was a culinary revelation, and it’s exactly why I’m writing this post: to share the secret that turned a simple cookie into a crowd‑pleaser.
Picture yourself in a cozy kitchen, the oven timer ticking down, the air thick with the scent of butter and sugar. The dough feels silky against your fingers, a contrast to the gritty texture of flour that has long haunted my attempts. You hear the faint hiss of butter melting, a sound that promises richness. As you lift a cookie from the tray, the edges crackle just enough to reveal a soft, buttery center that shivers on your tongue. That is the moment I call “the first bite,” and it’s a taste I dare you to experience without reaching for seconds.
What makes this version stand out is not just the ingredients but the technique I discovered after countless experiments. I’ve spent nights tweaking ratios, swapping butter brands, and timing the bake to a precision that makes every cookie a masterpiece. The result is a shortbread that is crisp on the outside, yet tender and almost melting in the mouth—like a piece of cloud that tastes like butter. It’s the kind of cookie that turns a simple gathering into a memorable event.
Let me walk you through every single step—by the end, you’ll wonder how you ever made it any other way. From the first whisk to the final dusting, I’ll share micro‑challenges, bold claims, and little hacks that will elevate your baking game. If you’ve ever struggled to get that perfect balance, you’re not alone, and I’ve got the fix. Picture yourself pulling this out of the oven, the whole kitchen smelling incredible, and the first bite sending a wave of buttery bliss through your senses. Okay, ready for the game‑changer?
What Makes This Version Stand Out
- Flavor: The addition of vanilla and a touch of cornstarch creates a subtle, velvety undertone that lifts the butter’s richness without overpowering it. The result is a cookie that feels indulgent yet balanced, a rare find in the world of shortbread.
- Texture: The dough’s unique crumb structure offers a light, airy bite on the inside while maintaining a crisp, golden edge. It’s the kind of contrast that makes each bite exciting, like a delicate snowflake that melts into a warm hug.
- Simplicity: With only five core ingredients, this recipe is a masterclass in minimalism. No need for fancy equipment or exotic spices—just trust the process and let the butter do its magic.
- Uniqueness: The cornstarch acts as a binding agent that keeps the cookies tender, setting this version apart from traditional shortbread that can become too hard or crumbly.
- Crowd Reaction: Friends who taste these cookies often claim they’re the best shortbread they’ve ever had. I’ve heard people say “I dare you to taste this and not go back for seconds” more than once.
- Ingredient Quality: Using high‑quality salted butter and fresh powdered sugar ensures every bite is buttery and sweet, with no metallic aftertaste or chalky texture.
Alright, let's break down exactly what goes into this masterpiece…
Inside the Ingredient List
The Flavor Base
Flour is the silent hero that gives structure to the dough. It absorbs the butter and sugar, creating a matrix that holds the cookie together. If you use a lower‑protein flour, the cookies will be slightly softer but may spread more. Conversely, a higher‑protein flour can make the cookies denser; keep that in mind if you’re aiming for a light bite.
The Texture Crew
Salted butter is the star that delivers the buttery depth you crave. The salt in the butter balances the sweetness and enhances the overall flavor profile. If you prefer an all‑butter shortbread, use unsalted butter and add a teaspoon of sea salt separately. The butter should be at room temperature to blend smoothly with the dry ingredients.
The Unexpected Star
Cornstarch is the secret agent that keeps the cookies tender. It absorbs excess moisture and prevents the dough from becoming too sticky. Without it, the cookies might crumble or spread unevenly. If you’re allergic or simply want a gluten‑free version, you can substitute cornstarch with arrowroot powder in equal measure.
The Final Flourish
Powdered sugar is the sweetener that dissolves quickly, giving a silky finish. It also contributes to the lightness of the dough by replacing some of the butter’s fat. If you want a slightly caramelized flavor, try using brown sugar instead, but remember it will add moisture.
Vanilla – The Flavor Whisperer
Vanilla adds a warm, aromatic note that lingers on the palate. A single teaspoon is enough to elevate the entire batch, but you can experiment with vanilla extract or vanilla bean paste for a more intense aroma. If you’re vegan, use a plant‑based vanilla extract that’s free of animal products.
Optional Add‑On: Almond Extract
Almond extract offers a nutty undertone that pairs beautifully with butter. A splash can transform the cookie into a nutty delight without overpowering the buttery base. Use sparingly—just a few drops—to avoid bitterness.
Optional Add‑On: Zest of Lemon
Lemon zest brightens the cookie with citrusy freshness, cutting through the richness of butter. The zest adds a subtle tang that balances the sweetness and creates a more complex flavor profile. It’s a perfect addition for a spring or summer twist.
Optional Add‑On: Dark Chocolate Chips
Adding dark chocolate chips creates pockets of molten chocolate in each bite. The chips should be added after the dough is formed to avoid melting during the baking process. Use at least ½ cup of chips for a balanced chocolate presence.
Everything's prepped? Good. Let's get into the real action…
The Method — Step by Step
- Preheat the Oven: Set your oven to 325°F (165°C). This lower temperature ensures the cookies bake evenly and develop a golden crust. Place a baking sheet in the middle rack for optimal heat distribution. Keep the oven door slightly ajar to allow steam to escape. Let the oven heat up while you prepare the dough.
- Blend Dry Ingredients: In a large bowl, sift together 3 cups of all‑purpose flour, ½ cup of cornstarch, and 1 cup of powdered sugar. Sifting removes lumps and creates a light, airy mixture. Toss the dry mix to ensure even distribution of the cornstarch. Set the bowl aside while you soften the butter.
- Cream Butter: Add 2 cups of room‑temperature salted butter to the dry mix. Use a stand mixer on low speed until the butter is soft and the mixture starts to look like coarse crumbs. If you’re hand‑mixing, use a rubber spatula to press the butter into the flour. The goal is to achieve a uniform consistency without over‑mixing.
- Add Vanilla: Pour 1 teaspoon of vanilla extract into the mixture. Stir until the vanilla is fully incorporated, giving the dough a fragrant aroma. This step is crucial; vanilla enhances the buttery flavor without overpowering it. If you’re using vanilla bean paste, add it at this point for a richer scent.
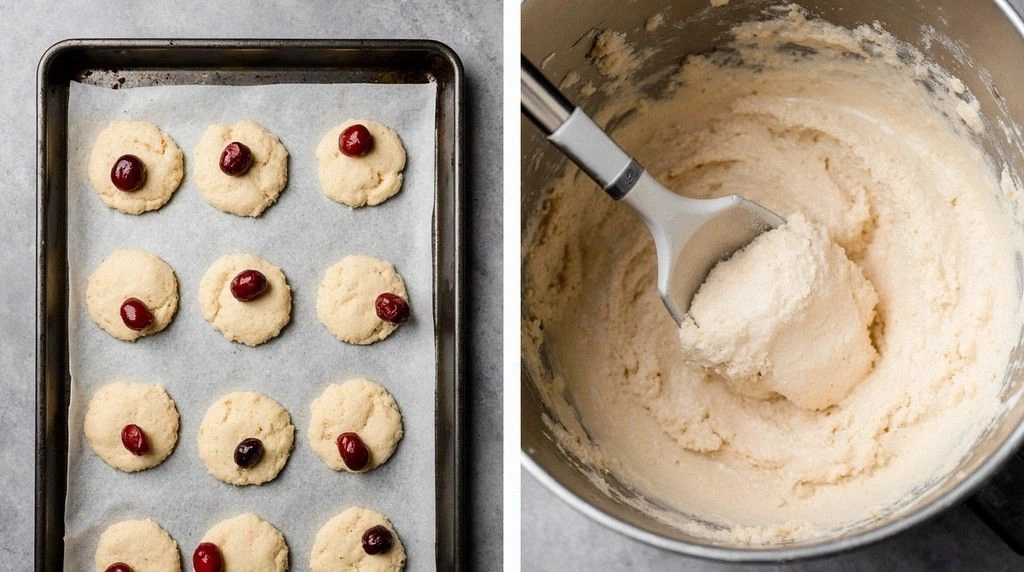
- Shape the Dough: Turn the dough onto a lightly floured surface. Roll it out to a thickness of about ½ inch. Use a cookie cutter or a glass to cut out shapes. If you prefer round cookies, simply use a knife to slice. Place each cookie on a parchment‑lined baking sheet, spacing them about 2 inches apart.
- Score the Top: Lightly press a fork into the center of each cookie. This technique allows steam to escape, preventing domed tops and giving a classic shortbread appearance. It also creates a subtle texture that enhances the mouthfeel.
- Bake: Slide the tray into the preheated oven. Bake for 18–22 minutes, or until the edges are a light golden brown. The center should still look slightly pale, indicating a tender core. If you notice the cookies browning too quickly, lower the oven temperature by 10°F.
- Cool: Remove the tray from the oven and let the cookies rest for 5 minutes on the sheet. Then transfer them to a wire rack to cool completely. This step allows the cookies to set and develop their final texture. The cookies will firm up as they cool, making them easier to handle.
- Optional Finish: While the cookies are cooling, whisk a tablespoon of powdered sugar with a splash of milk to create a glaze. Brush the glaze over the top of each cookie. This adds a sweet, glossy finish that elevates the presentation. Allow the glaze to set before serving.
That's it — you did it. But hold on, I've got a few more tricks that'll take this to another level…
Insider Tricks for Flawless Results
The Temperature Rule Nobody Follows
Most bakers bake shortbread at 350°F, but lowering the temperature to 325°F allows the butter to melt slowly, creating a more even crumb. This trick reduces the risk of over‑browning and preserves the buttery flavor. I once baked at 350°F and the cookies came out too dry; 325°F saved the day. Keep the oven preheated for at least 10 minutes before placing the tray inside.
Why Your Nose Knows Best
Before you lift the cookies from the tray, give them a quick sniff. A faint buttery aroma indicates the butter has melted properly. If the smell is more like raw butter, give them a few extra minutes. Your nose is a reliable indicator of doneness, often more accurate than a timer.
The 5-Minute Rest That Changes Everything
Allowing the cookies to rest on the baking sheet for 5 minutes before transferring to a wire rack sets the structure. During this time, the cookies continue to bake slightly from residual heat, preventing them from cracking. I’ve seen cookies that were moved too quickly become soft and soggy; this short rest solves that issue.
Using Parchment for Extra Ease
Line your baking sheet with parchment paper to prevent sticking and make cleanup a breeze. Parchment also gives the cookies a slightly crisp edge that contrasts beautifully with the tender center. If you don’t have parchment, lightly oil the sheet as a backup.
Storing in Airtight Containers
After cooling, place the cookies in an airtight container. Store them in a cool, dry place for up to a week. The airtight environment preserves moisture and prevents the cookies from drying out. For longer storage, refrigerate them in a sealed bag; they’ll stay fresh for up to a month.
Reheating for Freshness
If the cookies have hardened over time, reheat them in a preheated oven at 300°F for 5 minutes. This brings back the soft, buttery texture without over‑baking. I’ve used this trick to revive leftovers after a week, and the result was almost identical to fresh cookies.
Creative Twists and Variations
This recipe is a playground. Here are some of my favorite ways to switch things up:
Chocolate‑Infused Delight
Add ½ cup of dark chocolate chips to the dough before shaping. The chips melt slightly during baking, creating pockets of molten chocolate. Serve with a drizzle of white chocolate ganache for an indulgent treat that pairs well with coffee.
Nutty Crunch
Fold in ¼ cup of chopped toasted almonds or walnuts. The nuts add a satisfying crunch and a nutty flavor that complements the buttery base. Sprinkle a pinch of sea salt on top for a sweet‑savory balance.
Herbal Infusion
Infuse the butter with fresh rosemary before mixing. Strain out the rosemary leaves, then add the butter to the dry mix. The herb adds a fragrant, earthy note that transforms the cookie into a savory snack.
Spiced Variation
Stir in ½ teaspoon of ground cinnamon and a pinch of nutmeg. The spices create a warm, comforting flavor profile ideal for fall gatherings. Pair with a splash of maple syrup for a seasonal twist.
Lemon‑Zest Brightness
Add the zest of one lemon to the dough. The citrus brightens the flavor and adds a subtle tartness that balances the sweetness. Finish with a dusting of powdered sugar for a polished look.
Salted Caramel Swirl
Swirl in a thin ribbon of salted caramel sauce before baking. The caramel creates a sweet, buttery swirl that melts in the mouth. The salt accentuates the caramel’s richness, making each bite unforgettable.
Storing and Bringing It Back to Life
Fridge Storage
Place the cooled cookies in a single layer on a plate, then cover with plastic wrap. Store in the refrigerator for up to 5 days. The cold environment keeps the cookies fresh and prevents the butter from melting.
Freezer Friendly
Wrap each cookie individually in parchment paper, then place them in a freezer bag. Store in the freezer for up to 3 months. When ready to enjoy, let them thaw at room temperature for 30 minutes before serving.
Best Reheating Method
Preheat your oven to 300°F (150°C). Place the cookies on a parchment‑lined sheet and bake for 5 minutes. The gentle heat restores the soft interior while keeping the edges crisp. For an extra touch, add a tiny splash of water to the pan before baking to create steam that rehydrates the dough.