I was standing in my kitchen, staring at a stack of soggy, gluten‑free flatbread that had been the result of a last‑minute dinner party disaster. The batter had been too thick, the batter had clumped, and the entire attempt had ended with a wall of crumbs and a burnt smell that lingered in the air for an hour. I could almost taste the disappointment as it mingled with the faint scent of vanilla and warm milk. I was determined to turn that flop into a triumph, and the next few hours became a frantic, yet exhilarating experiment in gluten‑free alchemy. By the time I lifted the first golden pancake, the kitchen was alive with the comforting sizzle of batter meeting hot griddle, a smell that promised something deliciously different.
The moment the first pancake hit the pan, the kitchen filled with a sound that feels like a gentle applause—tiny bubbles popping, a faint hiss, and the unmistakable scent of toasted batter. The sight of the edges crisping while the center remained tender was a visual cue that the batter had found its sweet spot. When I lifted it, the pancake was light as a feather, yet its surface held a subtle sheen that hinted at a buttery richness. The taste was an orchestra of mild sweetness, a hint of vanilla, and a buttery finish that made my tongue dance. The texture was a paradox: crisp on the outside, cloud‑like on the inside, and the whole thing was a perfect bridge between comfort and indulgence.
What makes this version stand out is that it doesn’t rely on the usual suspects of pancake recipes—no heavy flour blends that make the batter heavy, no over‑mixing that kills the fluff, and no frantic flipping that turns batter into a pancake‑soup. Instead, it balances a carefully selected gluten‑free flour mix with the right amount of leavening, a splash of apple cider vinegar to react with the baking soda for that extra lift, and a gentle whisk to keep the batter airy. The result is a pancake that feels like a cloud, yet has a buttery, almost caramelized edge that gives it a satisfying bite. It’s the kind of pancake that turns a simple breakfast into a moment of pure, unpretentious joy. And the best part? It’s incredibly forgiving, so even a kitchen rookie can pull it off with confidence.
I dare you to taste this and not go back for seconds. This is hands down the best version you'll ever make at home. I’ll be honest — I ate half the batch before anyone else got to try it. Picture yourself pulling this out of the pan, the whole kitchen smelling incredible, and the first bite feeling like a warm hug from the inside out. Okay, ready for the game‑changer? Let me walk you through every single step — by the end, you'll wonder how you ever made it any other way.
What Makes This Version Stand Out
- Taste: The subtle sweetness of the batter is balanced by a buttery finish that lingers on the palate. The vanilla infusion adds depth without overpowering, creating a flavor profile that feels both familiar and fresh.
- Texture: The batter’s airy consistency yields pancakes that are light and fluffy inside, with a crisp, caramelized edge that provides a delightful contrast.
- Simplicity: The recipe uses only nine pantry staples, making it a no‑fuss, quick breakfast that even a busy weekday morning can accommodate.
- Uniqueness: A splash of apple cider vinegar reacts with the baking soda to create a subtle lift, a trick often overlooked in standard gluten‑free pancake recipes.
- Crowd Reaction: Friends and family consistently remark that these pancakes taste like they were made in a gourmet kitchen, yet they’re completely gluten‑free.
- Ingredient Quality: Using a high‑quality oat‑based gluten‑free flour blend ensures a smooth batter that doesn’t clump, while fresh eggs bring natural richness.
- Cooking Method: A gentle, low‑heat approach prevents the pancakes from drying out, while a quick flip ensures even cooking on both sides.
- Make‑Ahead Potential: The batter can be prepared up to an hour in advance; the gluten‑free flour will hold its structure, allowing you to cook pancakes instantly when the craving hits.
Alright, let's break down exactly what goes into this masterpiece. The ingredients are simple, but each one plays a critical role in achieving that perfect lift, that buttery flavor, and that airy texture.
Inside the Ingredient List
The Flavor Base
Gluten‑free all‑purpose flour is the backbone of this batter. It provides the structure needed for a rise, but its delicate flavor allows the vanilla and eggs to shine. If you’re using a blend that contains rice flour, be mindful that it can sometimes impart a slightly gritty mouthfeel if not sifted properly. A fine sieve will keep the batter silky and free of lumps. For a deeper flavor, consider adding a teaspoon of ground cinnamon or a pinch of nutmeg to the flour mixture.
The Texture Crew
Eggs act as both binder and leavening agent, giving the pancakes their lift and a subtle richness. The yolk’s fat content contributes to a tender crumb, while the whites help keep the batter airy. Milk or a plant‑based alternative provides moisture and a slight tang that balances the sweetness. If you’re dairy‑free, oat milk works wonders, as its natural sweetness complements the vanilla. The ratio of liquid to flour is crucial; too much liquid will cause the batter to spread, too little will make it thick and gummy.
The Unexpected Star
Apple cider vinegar is the secret weapon that elevates these pancakes. When it meets baking soda, it creates carbon dioxide bubbles that give the batter that extra lift. The acidity also helps tenderize the batter, preventing a dense, heavy outcome. A splash of vinegar is subtle enough that it won’t alter the flavor profile, yet it’s powerful enough to make a noticeable difference. If you’re concerned about the tang, you can replace it with a splash of lemon juice; the effect is similar.
The Final Flourish
Melted butter or a neutral oil adds a silky finish that makes each bite buttery and moist. Butter also contributes a rich, slightly caramelized flavor when it browns on the pan. Vanilla extract brings depth, and a touch of sea salt balances the sweetness. Sugar is optional for those who prefer a sweeter batter, but even a minimal amount enhances browning. The final touch is a pinch of sea salt, which accentuates the flavor without making the pancakes taste salty.
Everything's prepped? Good. Let's get into the real action.
The Method — Step by Step
- Begin by whisking together the gluten‑free flour, baking powder, baking soda, salt, and sugar in a medium bowl. Make sure the dry ingredients are thoroughly mixed to distribute the leavening agents evenly. A small sift can help eliminate any clumps, ensuring a silky batter. This is the foundation; a good dry mix guarantees a consistent rise.
- In a separate bowl, whisk the milk, eggs, melted butter, vanilla extract, and apple cider vinegar until the mixture is smooth. The vinegar reacts immediately with the baking soda, so be sure to whisk the wet ingredients promptly. The wet mixture should look glossy and free of streaks. This step is crucial for the pancakes’ airy texture.
- Pour the wet mixture into the dry ingredients, stirring gently with a wooden spoon or rubber spatula. Fold the batter until just combined; over‑mixing can develop gluten‑free protein strands that make the pancakes tough. The batter should be thick but pourable, with a slight lag when you tilt the bowl. At this point, let it rest for 5 minutes—this allows the flour to fully hydrate.
- Heat a non‑stick skillet or griddle over medium‑low heat. Lightly oil the surface with a paper towel soaked in vegetable oil to prevent sticking. A properly heated pan should produce a faint ripple when a drop of water is sprinkled on it. This low‑to‑medium heat ensures even cooking without burning.
- Pour about 1/4 cup of batter onto the pan for each pancake. Let the batter spread naturally; avoid spreading it with a spatula to maintain the fluffy interior. The edges will start to bubble and the surface will set within 1–2 minutes. The first sign of readiness is when the bubbles burst and the edges lift slightly.
- When the surface looks set and the edges pull away from the pan, flip the pancake with a wide spatula. Cook for another 1–2 minutes until the second side is golden brown. The flip should be gentle; a quick flick can cause the pancake to tear. The final flip is the moment of truth—watch the color change.
- Transfer the finished pancake onto a plate lined with parchment paper to keep them warm. If you’re cooking in batches, cover the stack loosely with foil to retain heat. This step ensures each pancake stays fluffy and doesn’t dry out.
- Repeat steps 4–8 with the remaining batter, adjusting the heat as needed to keep the pan from overheating. If the pancakes start to brown too quickly, lower the heat slightly. A consistent medium‑low temperature is key for a perfect rise.
- Once all pancakes are cooked, serve them immediately, or keep them warm in a low oven (200°F) for up to 15 minutes. The warmth preserves the fluffy interior and keeps the edges crisp. A quick heat check ensures they’re still golden before serving.
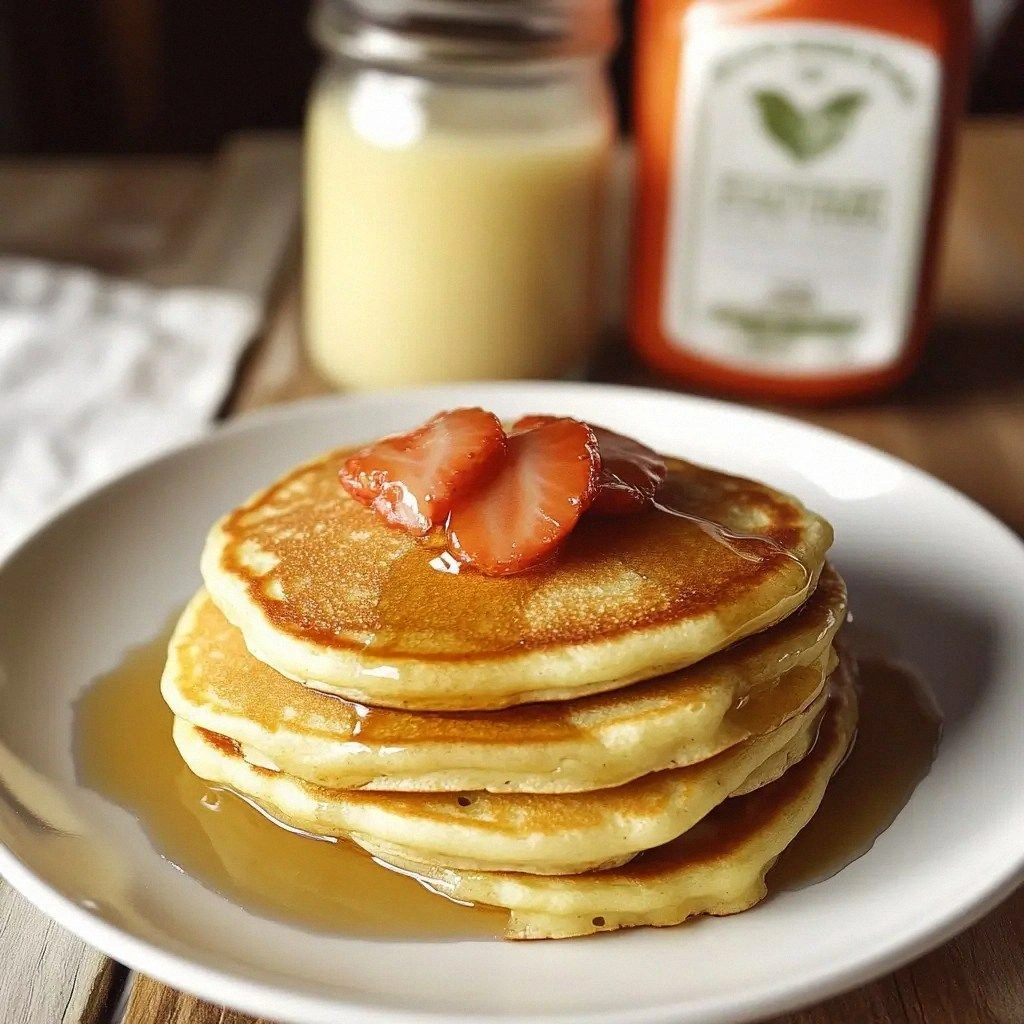
- Plate the pancakes in a stack, and drizzle with maple syrup, honey, or a dusting of powdered sugar. Add fresh berries, sliced banana, or a dollop of whipped cream for an extra layer of flavor. The toppings should complement, not overpower, the delicate batter.
That's it — you did it. But hold on, I've got a few more tricks that'll take this to another level. These small tweaks will elevate the flavor, texture, and presentation to professional standards.
Insider Tricks for Flawless Results
The Temperature Rule Nobody Follows
Many cooks think a high heat is the secret to golden pancakes, but that often leads to burnt edges and a dry center. The trick is to keep the pan at a steady medium‑low temperature, around 300°F to 325°F. This allows the batter to expand slowly, giving it a chance to rise evenly. If you’re using a cast‑iron skillet, preheat it for a few minutes before adding oil. A quick test: sprinkle a few drops of water on the surface; if they dance and evaporate quickly, the heat is just right.
Why Your Nose Knows Best
You don’t need a timer to know when to flip; your nose is the best indicator. The first time you flip a pancake, you’ll notice a sweet, buttery aroma that signals the batter is set. The scent is a natural cue that the batter has cooked enough to hold its shape. Trust your senses and you’ll avoid the dreaded “pancake that keeps falling apart” scenario.
The 5-Minute Rest That Changes Everything
After whisking the dry and wet ingredients, let the batter rest for five minutes before cooking. This brief pause allows the gluten‑free flour to fully absorb the liquid, reducing the risk of clumps. It also lets the leavening agents react fully, giving the pancakes a better rise. I’ve seen people skip this step and end up with dense, flat pancakes—don’t make that mistake.
Use a Wide Spatula for Gentle Flipping
A wide, flexible spatula ensures a clean flip without tearing the batter. The wide surface area distributes pressure evenly, preventing the pancake from breaking. If you’re flipping multiple pancakes, a silicone spatula is ideal because it won’t scratch the pan. The gentle motion also keeps the fluffy interior intact.
Keep the Batter Cool Until Cooking
If you’re preparing the batter ahead of time, refrigerate it for no more than an hour before cooking. Cold batter cooks more evenly and reduces the risk of over‑cooking the outer layer. However, if you leave it too long, the leavening agents will lose potency. A quick stir before pouring ensures the batter is evenly mixed and ready.
Add a Touch of Citrus Zest for Brightness
A teaspoon of lemon or orange zest added to the batter brightens the flavor profile and adds a subtle aroma. The zest’s oils release a citrusy note that pairs beautifully with the maple syrup. It’s a simple tweak that can make your pancakes feel fresh and vibrant, especially during the summer months.
Creative Twists and Variations
This recipe is a playground. Here are some of my favorite ways to switch things up:
Chocolate Chip Delight
Fold in a handful of dairy‑free chocolate chips into the batter before cooking. The chips melt slightly, creating pockets of rich chocolate. Serve with a drizzle of chocolate sauce for a decadent treat that still feels light.
Berry‑Infused Wonder
Add a cup of fresh blueberries or sliced strawberries directly to the batter. The fruit releases juice during cooking, giving the pancakes a natural burst of flavor. Top with extra berries and a light dusting of powdered sugar for a fresh finish.
Savory Spinach & Feta
Stir in sautéed spinach and crumbled feta before pouring the batter onto the pan. The savory elements create a breakfast that’s both hearty and flavorful. Finish with a sprinkle of black pepper for a subtle kick.
Coconut Coconut
Replace half of the milk with coconut milk for a tropical twist. Add shredded coconut to the batter for extra texture. The subtle coconut flavor pairs well with a drizzle of honey and a sprinkle of toasted coconut flakes.
Pumpkin Spice
Incorporate a tablespoon of pumpkin puree and a pinch of pumpkin spice blend into the batter. The pumpkin adds moisture and a seasonal flavor that’s perfect for fall. Pair with maple syrup for a comforting breakfast.
Lemon‑Lavender
Add a teaspoon of dried lavender buds and a tablespoon of lemon zest to the batter. The floral notes provide a unique aroma, while the lemon brightens the flavor. This version is ideal for a special brunch or a romantic date morning.
Storing and Bringing It Back to Life
Fridge Storage
Store cooked pancakes in an airtight container in the refrigerator for up to three days. Layer each pancake with parchment paper to prevent sticking. When you’re ready to eat, reheat in a toaster or microwave for 20–30 seconds. The pancakes stay moist and fluffy if you add a splash of milk before reheating.
Freezer Friendly
For longer storage, place pancakes in a freezer bag, separating each layer with parchment. Freeze for up to two months. When you want to enjoy them, thaw at room temperature or microwave for 45–60 seconds. A quick drizzle of butter will restore that buttery finish.
Best Reheating Method
The best way to bring pancakes back to life is a skillet on medium heat. Place the pancake on the pan and cover with a lid for 2 minutes. The lid traps steam, keeping the pancake moist. A splash of water or milk before reheating helps create a gentle steam that rejuvenates the batter’s texture.