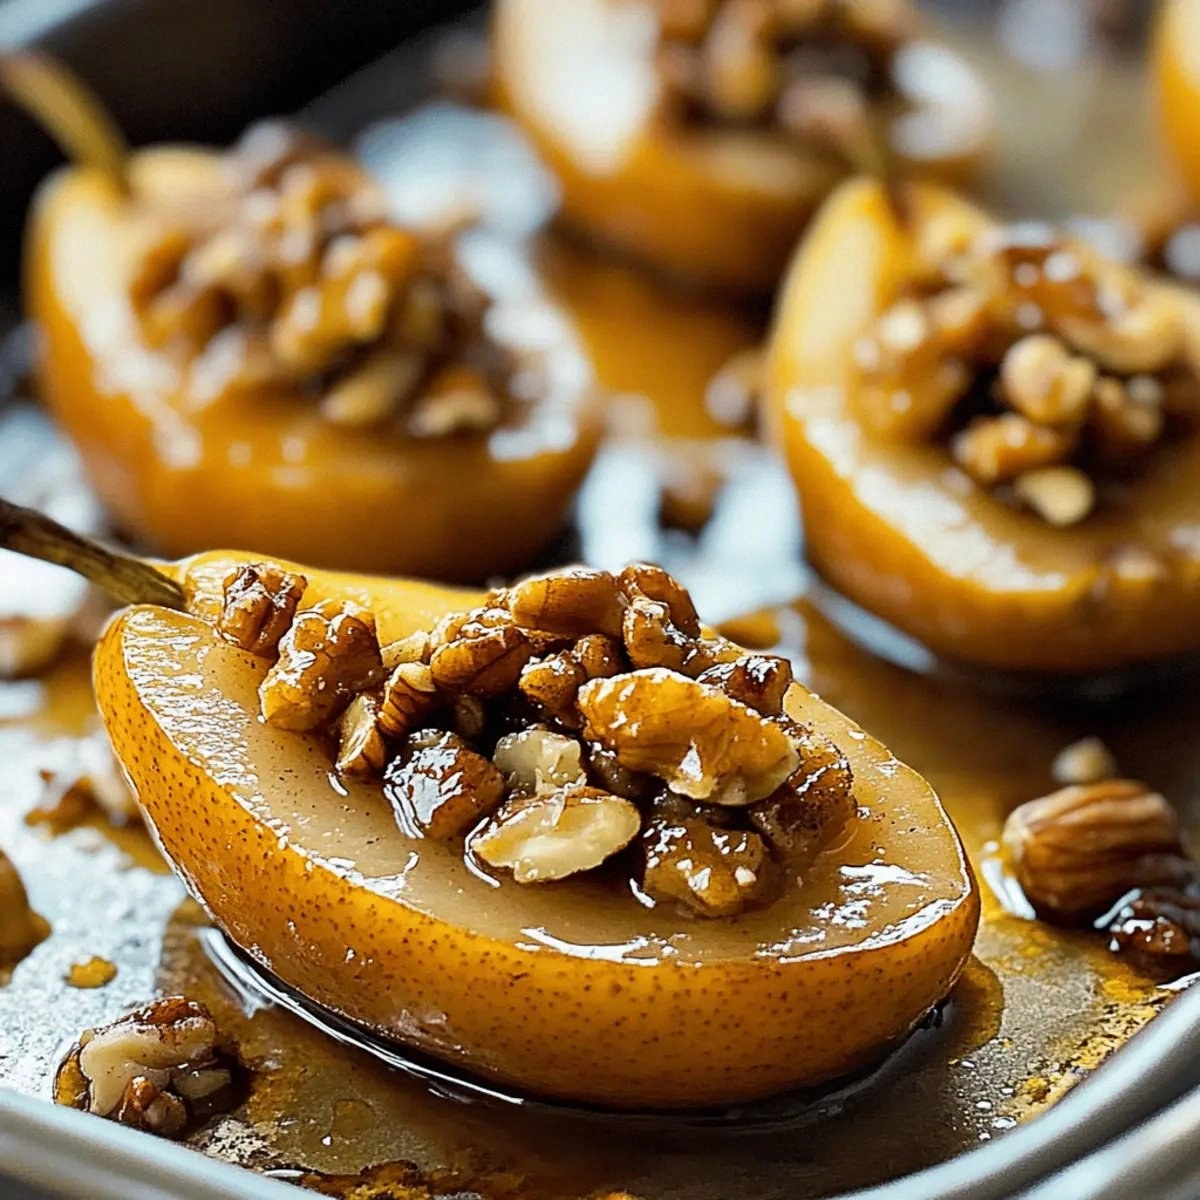
I burned a batch of cookies so badly last winter that the smoke alarm became my dinner bell. There I stood, waving a dish towel like a white flag of surrender, when my neighbor knocked with a bag of pears and a challenge: "Bet you can't make something magical without turning it into charcoal." Game on. What emerged from that slightly traumatized oven became the dessert that now ends every dinner party I host, the one friends request by texting me a single pear emoji, the one my nephew calls "warm hugs on a plate." These cozy cinnamon stuffed pears are hands down the best version you'll ever make at home, and I dare you to taste this and not go back for seconds.
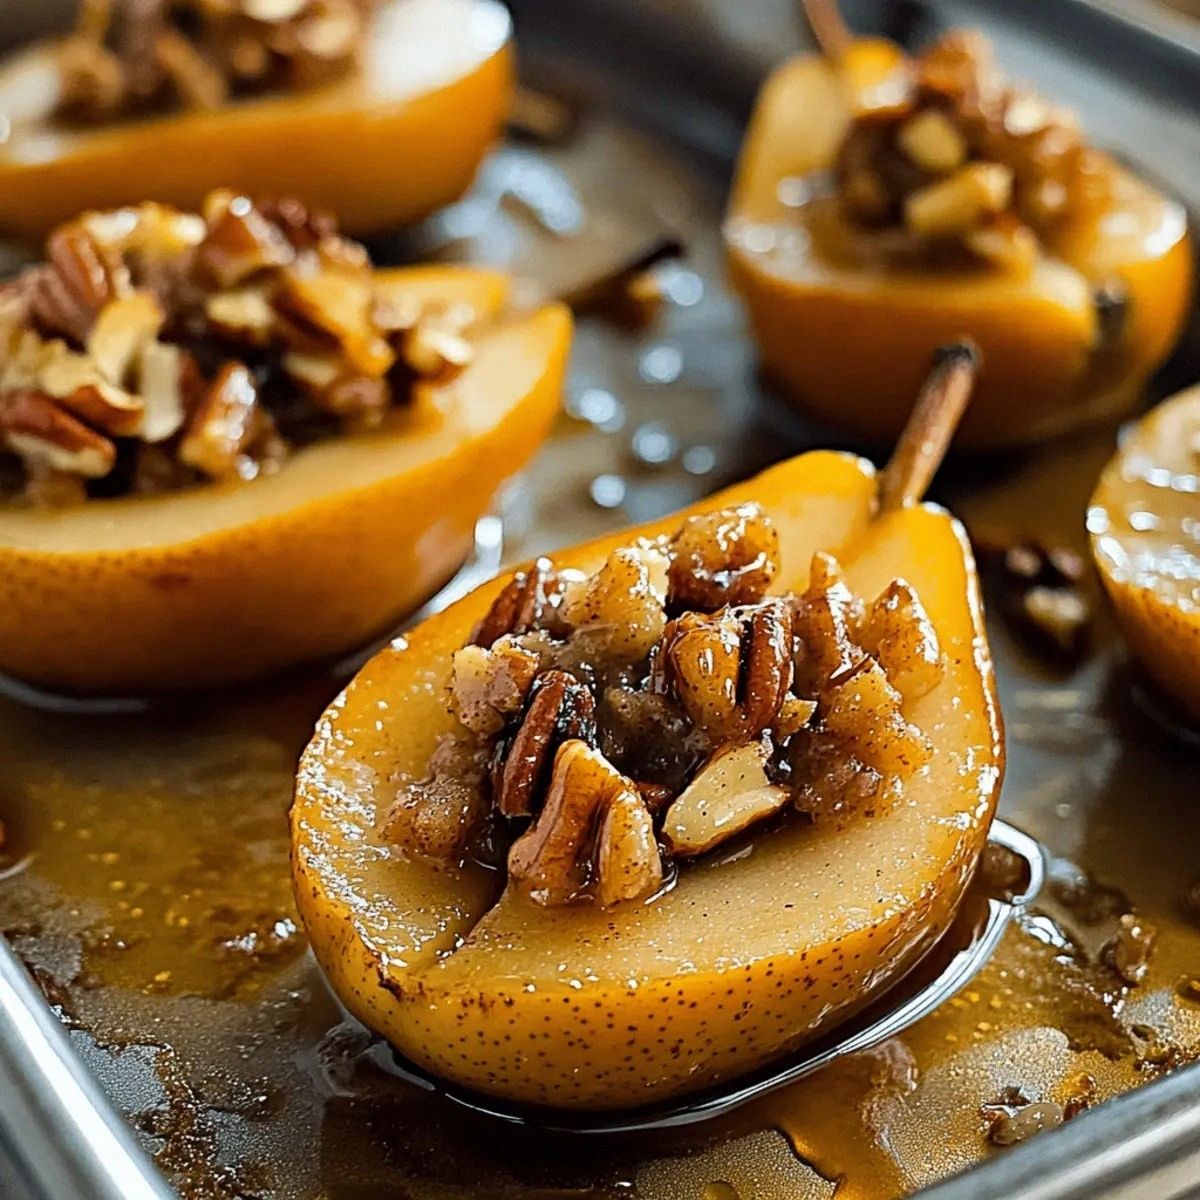
Picture yourself pulling this out of the oven, the whole kitchen smelling like someone bottled autumn and added a shot of vanilla. The pears slump into their baking dish like they're settling into a favorite armchair, their cut edges caramelized to a glossy bronze. I'll be honest — I ate half the batch before anyone else got to try it, standing at the counter in my sock feet, fork in one hand, phone in the other trying to photograph the carnage. The texture hits that impossible middle ground between custard and fruit: soft enough to scoop with a spoon, yet holding just enough bite to remind you these were once living, sun-kissed orbs hanging from a tree.
Most recipes get this completely wrong. They either roast the pears into oblivion until they collapse into baby food, or they leave them stubbornly firm, the filling sitting on top like an awkward hat. Here's what actually works: a two-temperature roasting method that first steams the fruit tender, then blasts it with heat to create those sticky, jammy edges. The filling isn't just nuts and honey thrown together like some sad trail mix — it's a carefully balanced ratio of toasted crunch, warm spice, and floral sweetness that tastes like the inside of a cinnamon roll had a glow-up.
Okay, ready for the game-changer? We're going to macerate the dried fruits in a splash of whatever booze you have lurking in the cabinet — rum, bourbon, even that weird pear liqueur someone brought to game night. This plumps them into juicy jewels that burst when you bite down, adding pockets of concentrated flavor that make people close their eyes and sigh. Stay with me here — this is worth it. Let me walk you through every single step — by the end, you'll wonder how you ever made it any other way.
What Makes This Version Stand Out
Texture Symphony: While other recipes deliver either mushy pears or crunchy centers, this method creates a velvet-soft interior with a lightly caramelized exterior that holds its shape like a proud little boat. The nut filling stays crisp on top but melds with the pear's edges to form a chewy, almost toffee-like rim that will have you scraping the baking dish.
Spice Balance: Most versions drown the fruit in cinnamon until it tastes like potpourri. We use just enough to whisper warmth, letting the pear's natural perfume sing backup vocals. A hint of black pepper — yes, really — adds a subtle heat that makes the sweetness taste even more intense.
Make-Ahead Magic: These beauties can be stuffed and refrigerated up to two days ahead, then popped into the oven when guests arrive. They reheat like a dream, making them perfect for dinner parties when you want to look effortlessly sophisticated while actually watching Netflix in your pajamas.
Zero Waste Glory: The entire pear gets used — we scoop out the core to create a natural bowl, but save those fragrant scraps to simmer into a quick syrup for cocktails. Even the baking liquid becomes dessert gold, spooned over ice cream or stirred into morning yogurt.
Equipment Minimalism: One baking dish, one bowl, and a spoon. No fancy corers or melon ballers required — a teaspoon handles the hollowing perfectly. If you've ever struggled with finicky pastry bags or complicated folding techniques, you're not alone — and I've got the fix.
Flavor Evolution: These taste even better the next day, when the honey has had time to seep into every fiber of the fruit and the nuts have absorbed the pear's juice. Cold leftovers eaten standing in front of the fridge might be better than the hot version — I'm just saying.
Crowd Reaction Guarantee: I've served these to everyone from picky toddlers who "don't like fruit" to food snobs who claim dessert must involve chocolate. The bowl returns empty every single time, usually with someone asking if there's "more of that stuff" while pointing at the dish.
Inside the Ingredient List
The Flavor Foundation
The pears themselves matter more than you think. Bosc pears hold their shape like obedient soldiers, their long elegant necks providing the perfect handle for easy eating. Anjou works in a pinch, but they'll soften faster — reduce the initial steaming time by five minutes. Whatever variety you choose, look for fruit that yields slightly to pressure near the stem but still feels firm at the blossom end. Avoid any with wrinkled skin or soft spots, which indicate they're already heading toward compost territory.
Cinnamon is the star, but not just any dusty jar from the back of your spice cabinet. Freshly ground Ceylon cinnamon — sometimes labeled "true cinnamon" — delivers a bright, citrusy warmth that makes supermarket cassia taste like cardboard. Grind whole sticks in a spice grinder or micro-plane them directly into the bowl. The difference will make you rethink every apple pie you've ever eaten. If you only have regular cinnamon, toast it in a dry pan for thirty seconds until it smells like Christmas morning — this wakes up the oils and adds depth.
The Texture Crew
Nuts provide the crucial crunch contrast, but here's where most recipes phone it in with raw walnuts that taste like cardboard. We're going to toast them first until they smell like popcorn and leave oily fingerprints on the cutting board. Pecans bring buttery sweetness, almonds add clean snap, and pistachios contribute a gorgeous green hue that makes the filling look like jeweled treasure. Mix them if you're feeling fancy, but toast each type separately — their oil content varies, and burnt nuts will ruin everything faster than you can say "smoke alarm."
Honey isn't just sweetener — it's liquid gold that carries flavor and creates that glossy finish. Skip the plastic bear stuff and seek out something with character: orange blossom for floral notes, buckwheat for malty depth, or wildflower for a taste that changes with the seasons. Warm it slightly so it flows like silk when mixing, but don't let it bubble — overheated honey becomes bitter and loses its nuance.
The Unexpected Star
Dried fruits are where you get to play mad scientist. Golden raisins plump into translucent pearls that burst with honeyed juice. Dried cherries bring tart sophistication, like the friend who always wears red lipstick to brunch. Apricots add a sunset glow and subtle tang that makes the other flavors pop brighter. Chop them small — large chunks create air pockets where the filling can separate from the pear wall, leading to tragic collapse during serving.
The Final Flourish
Whipped cream might seem optional, but it's really the bridge that ties everything together. The cool, billowy cloud against the warm spiced fruit creates a temperature and texture contrast that makes each bite feel new. Skip the canned stuff — it tastes like sweetened air. Instead, whip cold heavy cream with just a whisper of vanilla and a pinch of salt. Under-whip slightly so it melts lazily into the crevices, carrying cinnamon and honey into every spoonful.
Everything's prepped? Good. Let's get into the real action...
The Method — Step by Step
- Preheat your oven to 375°F (190°C) — yes, we're starting hot. While it heats, slice a tiny sliver off the bottom of each pear so they sit flat without wobbling like drunk penguins. Using a small spoon or melon baller, scoop out the core from the blossom end, creating a cavity about an inch wide and deep enough to reach the seeds but not puncture through the bottom. Save those fragrant scraps in a small saucepan for later — we're making magic out of every scrap.
- Toss the nuts in a dry skillet over medium heat, shaking constantly until they smell like popcorn and develop dark toasty spots — about 4 minutes. Transfer to a plate immediately (they'll keep cooking from residual heat) and let cool completely. This next part? Pure magic. Once cool, chop them into pieces the size of lentils — not dust, not chunks, but the perfect size to provide crunch without overwhelming the delicate fruit.
- In a small bowl, combine the chopped nuts, cinnamon, honey, and dried fruits. Stir with a fork until it looks like expensive granola that's been partially crushed by a toddler — cohesive but still textured. The mixture should hold together when squeezed but crumble easily — add more honey by the teaspoon if it feels sandy, or more nuts if it's too sticky.
- Pack the filling into the pear cavities with the back of your spoon, mounding it slightly. Really press it in there — we want it to meld with the pear as it roasts, not tumble out like disappointing confetti. Place the stuffed pears in a baking dish just large enough to hold them snugly — they should support each other like tipsy friends at closing time.
- Pour water into the bottom of the dish until it reaches 1/4 inch up the sides — this creates steam to cook the pears gently and prevents the filling from burning. Cover tightly with foil and slide into the oven. Now, don't walk away from the stove here. Set a timer for 20 minutes — this is when we'll check for doneness.
- After 20 minutes, pierce the thickest part of a pear with a skewer or thin knife. It should slide in with slight resistance, like a hot knife through cold butter. If it meets hard fruit, recover and give them 5 more minutes. We're looking for tender but not collapsing — they'll finish cooking uncovered.
- Remove the foil and baste the pears with the syrupy liquid that's collected in the bottom of the dish. Increase the oven temperature to 425°F (220°C) — this is the moment of truth where we create that gorgeous caramelized exterior. Return uncovered and roast for another 10-15 minutes, basting once more halfway through. The edges should turn glossy and deep amber, like they've been kissed by a fireplace.
- While the pears finish, take those reserved scraps and add enough water to cover plus a tablespoon of honey. Simmer gently for 5 minutes, then strain — you've just made pear simple syrup for cocktails or morning coffee. That sizzle when it hits the pan? Absolute perfection.
- Transfer the pears to serving plates and spoon some of the caramelized juices over the top. They should slump slightly but maintain their dignity — if one collapses, it just means you get to eat the ugly one while plating the pretty ones for guests. Let them rest for 5 minutes — this allows the filling to set and prevents molten honey burns on tongues.
- Serve warm with a generous cloud of lightly sweetened whipped cream. The contrast between hot fruit and cool cream creates a temperature dance that makes each bite feel like the first. Garnish with a sprinkle of chopped nuts or a dusting of cinnamon if you're feeling fancy, but honestly, they're perfect naked.
That's it — you did it. But hold on, I've got a few more tricks that'll take this to another level...
Insider Tricks for Flawless Results
The Temperature Rule Nobody Follows
Room temperature pears roast more evenly than cold ones straight from the fridge. Take them out 30 minutes before cooking — this prevents the outside from turning to mush while the center stays crunchy. A friend tried skipping this step once — let's just say it didn't end well. She served pears that were simultaneously overcooked and underdone, like some kind of fruit paradox that confused everyone at the table.
Why Your Nose Knows Best
Don't trust timers alone — your nose is the most accurate kitchen tool you own. When the pears are perfectly roasted, your kitchen will smell like someone combined pear pie, toasted nuts, and honey into a single intoxicating cloud. If you smell anything sharp or bitter, pull them immediately — the honey is starting to burn. This happens fast, like within 30 seconds, so stay nearby during the final roasting stage.
The 5-Minute Rest That Changes Everything
Those pears need a moment to collect themselves after their hot oven journey. During the rest, the filling firms up slightly and the juices redistribute, preventing a flood of sticky liquid when you cut into them. Cover loosely with foil if your kitchen is drafty — we're not trying to cool them down, just let the steam escape so they don't continue cooking in their own heat.
Creative Twists and Variations
This recipe is a playground. Here are some of my favorite ways to switch things up:
Chocolate Hazelnut Indulgence
Replace half the nuts with toasted hazelnuts and add a tablespoon of cocoa powder to the filling. The chocolate enhances the pear's natural sweetness without overwhelming it, creating a sophisticated flavor that tastes like you spent hours on it. Drizzle with melted dark chocolate just before serving for extra drama.
Savory Cheese Surprise
Mix crumbled blue cheese into the nut filling — the funky saltiness against the sweet fruit creates a flavor explosion that converts even cheese skeptics. Use half the honey to balance the salt, and serve with port for the ultimate grown-up dessert experience.
Tropical Paradise Version
Swap the cinnamon for cardamom and use macadamia nuts with dried pineapple and coconut flakes. The tropical flavors transport you to a beach vacation, even in the dead of winter. A rum syrup drizzle takes it completely over the top.
Breakfast Transformation
Make mini versions using halved pears and serve over Greek yogurt with granola. The filling becomes a crunchy topping that makes ordinary yogurt feel like dessert for breakfast. My teenager requests this every Sunday morning, claiming it gives him "weekend energy."
Savory Side Dish
Omit the honey and dried fruit, instead mixing the nuts with fresh herbs like thyme and rosemary. Serve alongside pork or duck — the pears become a sophisticated alternative to applesauce. The contrast between savory meat and sweet fruit is pure culinary harmony.
Individual Crumble Topping
Press a mixture of flour, butter, and brown sugar on top of each stuffed pear during the final 10 minutes of roasting. It creates individual pear crumbles with no extra dishes, perfect for when you want comfort food but don't need a whole pan of temptation.
Storing and Bringing It Back to Life
Fridge Storage
Cooled pears keep beautifully in an airtight container for up to 4 days, though they're best within 48 hours. Store them in a single layer if possible — stacking causes the filling to stick and tear the delicate fruit. The flavors actually deepen and meld, making leftovers arguably better than fresh. Just remember to bring them to room temperature before reheating for the best texture.
Freezer Friendly
These freeze surprisingly well for up to 2 months. Wrap each cooled pear individually in plastic wrap, then place in a freezer bag with the air pressed out. Thaw overnight in the refrigerator, then reheat according to the instructions below. The texture softens slightly but the flavor remains intact — perfect for emergency dessert situations.
Best Reheating Method
Add a tiny splash of water before reheating — it steams back to perfection. Cover with foil and warm in a 325°F oven for 10-12 minutes, or microwave individual portions for 30-45 seconds. Don't overdo it or you'll return to mush territory. The filling should be warm and gooey but not molten, the pears heated through but still holding their shape.