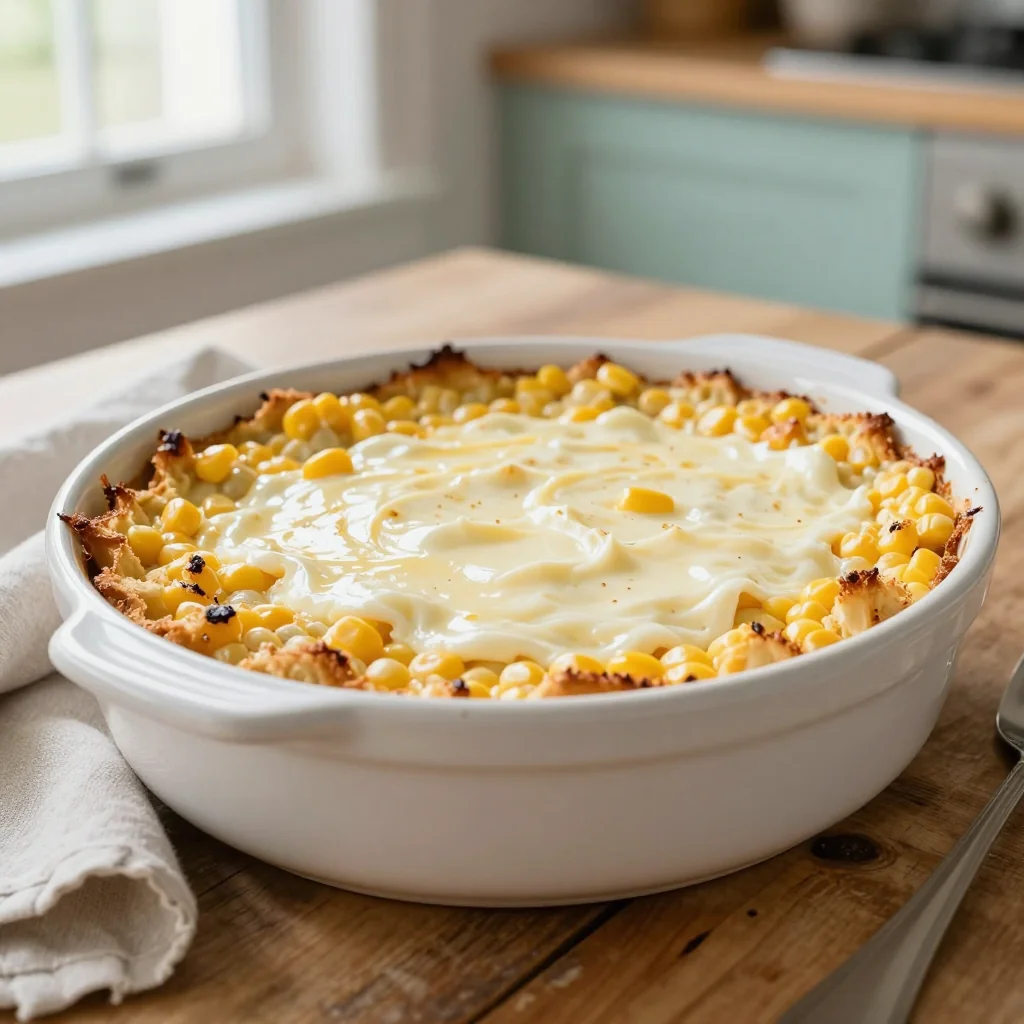
A comforting, buttery corn casserole that brings the warmth of a family kitchen to every bite.
The first time I tasted a corn casserole like this was at my grandmother’s farmhouse during a chilly autumn weekend. The scent of sweet corn mingling with the creamy tang of cream cheese drifted through the kitchen, wrapping us in a blanket of nostalgia that still feels vivid today. I remember the golden crust forming in the oven, a subtle crackle that announced the perfect moment to pull it out and let the steam rise.
Corn casserole is a staple in many American homes, especially in the Midwest where corn is celebrated as a seasonal hero. This version, elevated with a Jiffy corn muffin mix and a generous swirl of cream cheese, bridges the gap between a quick comfort side and a show‑stopping centerpiece. Whether you serve it alongside roasted turkey, grilled chicken, or as a hearty vegetarian main, its buttery richness and subtle sweet undertones make it unforgettable.
In this guide, I’ll walk you through every nuance—from selecting the freshest corn kernels to mastering the perfect bake. You’ll learn why each ingredient matters, how to adjust the recipe for any number of guests, and secret techniques that guarantee a velvety texture every single time. By the end, you’ll have a reliable, crowd‑pleasing dish that feels both home‑cooked and restaurant‑quality.
I’m thrilled to share this recipe with you, and I hope you’ll feel as excited to make it as I do. Let’s get started and bring a little sunshine to your table, no matter the season.
🌟 Why This Recipe Will Win Your Heart
From the first bite to the lingering aftertaste, this casserole offers layers of flavor, texture, and convenience that make it a standout at any gathering.
- ✨ Effortless Preparation: With just a handful of pantry staples and a short prep time, you’ll have a delicious dish on the table in under an hour.
- ✨ Crowd‑Pleasing Sweet‑Savory Balance: The natural sweetness of corn is perfectly countered by the tangy cream cheese, creating a harmonious flavor profile.
- ✨ Versatile Serving Options: Serve it as a side with holiday roasts, a main course with a fresh salad, or even as a brunch centerpiece with a drizzle of honey.
- ✨ Adaptable to Dietary Needs: Simple swaps allow you to make it gluten‑free, dairy‑free, or vegan without sacrificing taste.
- ✨ Beautiful Golden Crust: The Jiffy mix forms a lightly crisp, buttery top that adds visual appeal and a satisfying crunch.
- ✨ Freezer‑Friendly: Prepare the casserole ahead of time, freeze, and bake straight from the freezer for stress‑free meals.
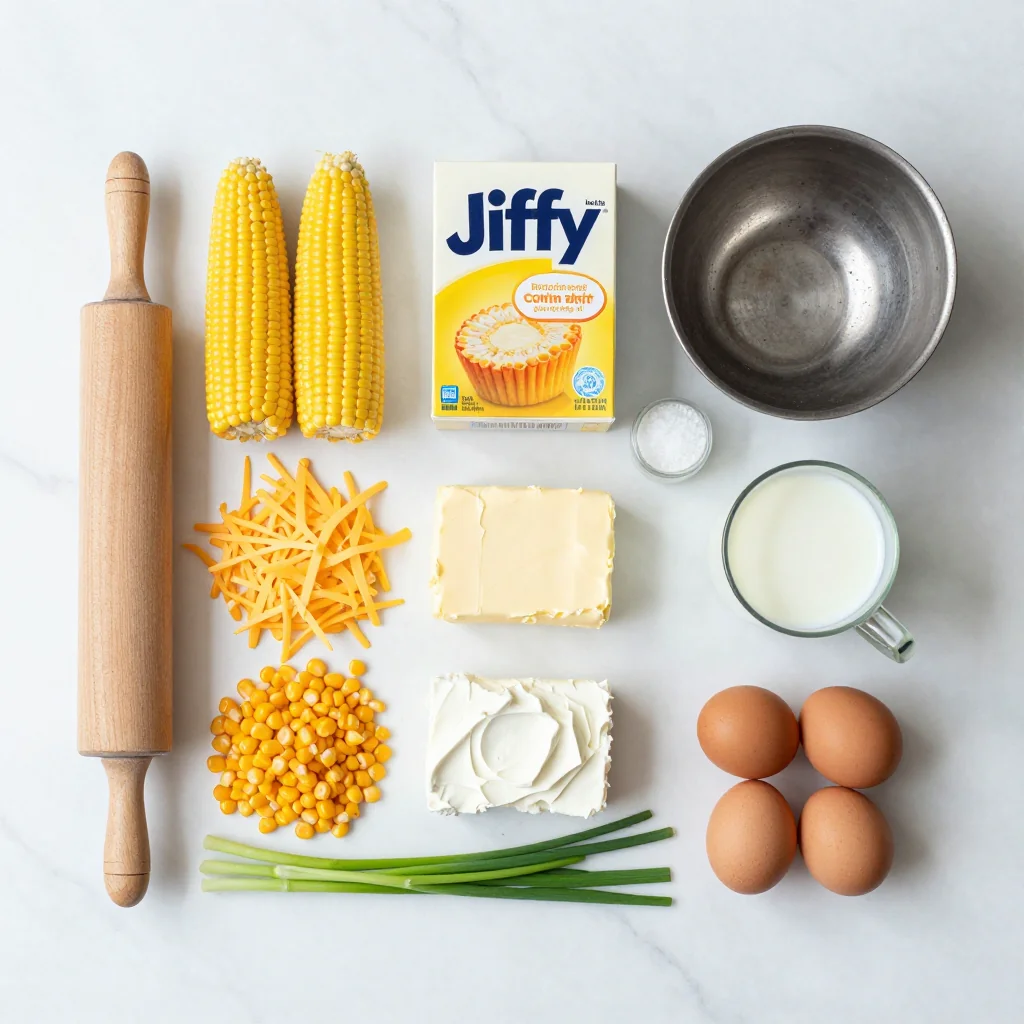
🥗 Ingredients
📝 Complete Ingredient List
For the Casserole Base:
For the Cream Cheese Topping:
🔍 Focus on Key Ingredients
Fresh Corn Kernels
Fresh corn kernels bring natural sweetness and a burst of juiciness that frozen corn often lacks. When selecting corn, look for ears with bright green husks, tightly wrapped kernels, and milky sap when you press a kernel. If fresh corn isn’t available, use frozen kernels that have been thawed and patted dry; they still deliver a wonderful texture.
Cream Cheese
The cream cheese creates a velvety, tangy layer that balances the corn’s sweetness. Choose a full‑fat, store‑bought variety for the richest flavor, and be sure to let it soften at room temperature before mixing, which prevents lumps and ensures a smooth topping.
Jiffy Corn Muffin Mix
Jiffy’s corn muffin mix is the secret behind the casserole’s golden, slightly crisp crust. Its blend of cornmeal, flour, and leavening agents gives the dish a light, airy structure while still holding the creamy interior together. It’s also a time‑saver, eliminating the need to measure dry ingredients separately.
🔄 Quick Substitutions
| If you don’t have... | Use instead... |
|---|---|
| Fresh corn kernels | Frozen corn, thawed |
| Cream cheese | Neufchatel cheese (slightly tangier) |
| Jiffy corn muffin mix | Homemade cornmeal batter (1 cup cornmeal, 1 cup flour, 1 tsp baking powder, 1/2 tsp salt) |
👨🍳 Step‑by‑Step Instructions
Follow these detailed steps to achieve a perfectly baked corn casserole with a creamy, golden topping. Each phase is designed to guide you through preparation, cooking, and finishing touches.
📋 Phase 1: Preparation & Mise en Place
Gather, measure, and pre‑heat to set the stage for a smooth cooking process.
Prep the Corn
Remove the husks and silk from the corn ears. Using a sharp knife, stand each ear upright and slice downward, cutting the kernels off the cob. You should end up with about six cups of kernels for this recipe. Rinse briefly to remove any stray silk, then pat dry with a clean kitchen towel.
Soften the Cream Cheese
Transfer the cream cheese to a medium bowl and let it sit at room temperature for about 15 minutes. Once softened, beat it with a hand mixer until smooth and fluffy, adding the sour cream, chives, and smoked paprika. This mixture will become the luscious topping.
🔥 Phase 2: Baking & Assembly
Combine the ingredients and bake to develop a golden crust and creamy interior.
Mix the Casserole Base
In a large mixing bowl, combine the Jiffy corn muffin mix, milk, melted butter, salt, and pepper. Stir until just blended—over‑mixing can make the texture dense. Fold in the fresh corn kernels and grated cheddar cheese, ensuring even distribution.
Transfer to Baking Dish
Lightly grease a 9‑inch square baking dish with butter or non‑stick spray. Pour the batter into the dish, spreading it evenly with a spatula. The mixture should rise slightly as it bakes, creating a light, airy interior.
Add the Cream Cheese Topping
Spoon the prepared cream cheese mixture over the top of the batter, using a spatula to spread it into an even layer. The topping will melt and form a delicate crust as it bakes, adding a tangy contrast to the sweet corn.
Bake the Casserole
Preheat your oven to 190°C (375°F). Place the dish in the center rack and bake for 30‑35 minutes, or until the top is golden brown and a toothpick inserted into the center comes out clean. The edges will pull away slightly from the sides of the dish, indicating a perfect bake.
✨ Phase 3: Finishing & Serving
Final checks, plating, and serving suggestions.
Check for Doneness
Insert a thin knife or skewer into the center; it should emerge hot and clean. If the top needs a little extra color, switch the oven to broil for 1‑2 minutes, watching closely to avoid burning.
Rest and Garnish
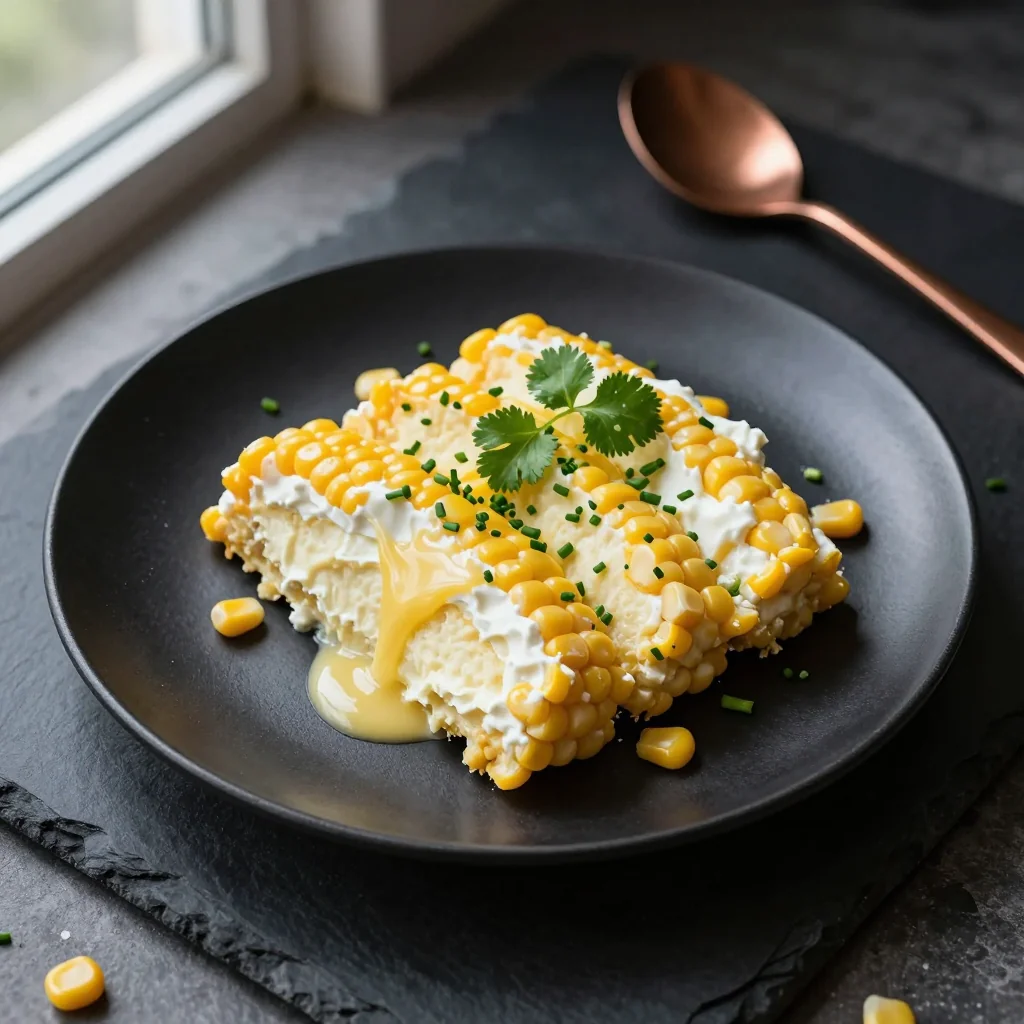
Allow the casserole to rest for 5 minutes after removing from the oven. This helps the flavors settle and makes slicing easier. Sprinkle additional fresh chives or a drizzle of melted butter for a glossy finish.
Serve Warm
Cut the casserole into squares and serve directly from the dish. It pairs beautifully with a crisp green salad, roasted vegetables, or a simple protein like grilled chicken. Enjoy while hot for the best texture.
💡 Expert Tips & Tricks
🛒 Choosing the Best Ingredients
Opt for corn that’s in season (late summer to early fall) for maximum sweetness. When buying cream cheese, select a brand with a high fat content; it melts smoothly and adds richness. For the cheddar, a sharp, aged variety provides a deeper flavor contrast to the sweet corn.
🔪 Preparation Techniques
When cutting corn off the cob, a sharp chef’s knife will give clean, uniform kernels that bake evenly. Use a large mixing bowl to avoid spillage when folding the cheese and corn together. A silicone spatula helps incorporate air without over‑mixing.
🌡️ Mastering the Bake
Pre‑heat the oven fully before inserting the casserole; this ensures the crust sets quickly. If your oven runs hot, place the dish on a lower rack and lower the temperature by 10°C. A kitchen thermometer can confirm the internal temperature reaches about 75°C (165°F) for safe consumption.
🍽️ Presentation & Service
Serve the casserole on a rustic wooden board for a farmhouse feel. Garnish with a sprinkle of fresh herbs—chives, parsley, or cilantro—depending on your palate. Pair with a light vinaigrette‑dressed salad to cut through the richness.
🏆 Pro Tips
Professional chefs focus on precision, flavor balance, and efficiency. Applying these insights can elevate your casserole from good to unforgettable.
- 🎯 Balance Sweet and Savory: Add a pinch of smoked paprika or a dash of hot sauce to the topping for a subtle smoky heat that complements the corn’s natural sweetness without overwhelming it.
- 🎯 Use a Water Bath: Place the baking dish in a larger pan filled with hot water (about 1‑2 cm deep) while baking. This gentle, moist heat prevents the crust from drying out and yields an ultra‑creamy interior.
- 🎯 Chill the Batter: After mixing, refrigerate the batter for 15‑20 minutes before baking. This allows the leavening agents to activate fully, resulting in a lighter, fluffier texture.
- 🎯 Butter the Rim: Brush the edges of the baking dish with melted butter before adding the batter. This creates a crisp, buttery crust that’s perfect for scooping out the last bite.
- 🎯 Incorporate Umami: Fold in a tablespoon of grated Parmesan cheese into the topping mixture. The umami depth enhances the overall flavor profile and adds a pleasant salty bite.
- 🎯 Finish with a Citrus Zest: A light sprinkle of fresh lime or lemon zest just before serving brightens the dish, balancing the richness of the cream cheese and butter.
“A great casserole is all about layers—texture, flavor, and love. When each layer sings, the whole dish becomes a celebration.” — Thomas Keller
🔄 Variations & Adaptations
This corn casserole is a flexible canvas. Below are several ways to tailor it to different dietary preferences, flavor cravings, and occasions.
🥬 Vegetarian / Vegan Version
Replace the cream cheese with a plant‑based cream cheese alternative and use dairy‑free cheddar. Swap the butter for olive oil or vegan butter. The Jiffy mix can stay the same, as it’s already egg‑free, but verify the label for any hidden dairy.
- Vegan cream cheese (e.g., Daiya) – 225 g
- Dairy‑free cheddar shreds – 200 g
- Olive oil – 2 tbsp (instead of butter)
🌶️ Flavor Variations
Experiment with global spices and herbs to give the casserole a new personality. Below are three exciting twists.
Spicy Chipotle
Add 1 tsp chipotle powder to the topping and a finely chopped jalapeño to the batter. Finish with a drizzle of chipotle aioli for an extra kick.
Mediterranean
Incorporate ½ cup crumbled feta cheese, 1 tbsp chopped rosemary, and a handful of Kalamata olives. Serve with a side of tzatziki for a fresh contrast.
Asian‑Inspired
Mix 1 tbsp soy sauce, 1 tsp grated ginger, and ½ tsp sesame oil into the batter. Top with toasted sesame seeds and sliced green onions after baking.
⚠️ Dietary Adaptations
Gluten‑Free
Substitute the Jiffy corn muffin mix with a gluten‑free cornmeal blend (1 cup cornmeal, ½ cup rice flour, ½ cup potato starch, 1 tsp xanthan gum). Adjust the liquid slightly if needed.
Lactose‑Free
Use lactose‑free cream cheese and dairy‑free cheddar. Replace whole milk with almond or oat milk for a creamy texture without lactose.
Low‑Calorie
Reduce the butter to 1 tbsp, use low‑fat cream cheese, and increase the corn proportion while cutting back on cheese. This keeps the dish satisfying while lowering overall calories.
👶 Family / Kid‑Friendly Version
For picky eaters, keep the flavor simple: omit the smoked paprika and chives, and use mild cheddar. Serve with a side of honey‑drizzled carrot sticks to add a sweet, familiar element that children love.
📦 Storage & Reheating
🧊 Storage
Refrigerator
- Duration: Up to 4 days
- Container: Airtight glass or plastic container
- Tip: Place a piece of parchment paper on top to prevent moisture buildup.
Freezer
- Duration: Up to 3 months
- Method: Cool completely, wrap tightly in foil, then place in a freezer‑safe bag.
- Defrost: Transfer to the refrigerator overnight before reheating.
💡 Note: For best texture, reheat from frozen in the oven rather than the microwave.
♨️ Reheating
🔥 Oven (Recommended)
- Preheat to 180°C (350°F).
- Cover with aluminum foil to retain moisture.
- Heat for 15‑20 minutes if refrigerated, or 30‑35 minutes if frozen.
- Remove foil and bake an additional 5 minutes to restore the golden crust.
⚡ Microwave (Quick)
- Place a slice on a microwave‑safe plate.
- Cover with a microwave‑safe lid.
- Heat on medium power for 1‑2 minutes, checking halfway.
- Let stand 1 minute before serving.
🍳 Skillet
Heat a non‑stick skillet over medium heat, add a teaspoon of butter, and gently warm individual slices, flipping once, until heated through.
🍷 Perfect Pairings
🥗 Side Dishes
- Mixed Green Salad with Lemon Vinaigrette: The acidity cuts through the richness, refreshing the palate.
- Roasted Brussels Sprouts with Balsamic Glaze: Their caramelized sweetness mirrors the corn’s flavor.
- Garlic‑Sauteed Green Beans: Adds a crisp, bright contrast to the creamy casserole.
🍷 Wine & Beverage Pairings
- Chardonnay (oaked): Its buttery notes echo the dish’s richness while its acidity balances the sweetness.
- Riesling (off‑dry): A hint of sweetness pairs beautifully with corn and cheese.
- Non‑Alcoholic: Sparkling apple cider provides a crisp, fruity lift.
🍰 To Complete the Meal
Start with a light appetizer like a cucumber‑mint gazpacho, follow with the corn casserole as the main, and finish with a simple dessert such as a vanilla panna cotta topped with fresh berries. The lightness of the dessert will round out the hearty main course perfectly.
❓ Frequently Asked Questions
Q: Can I use frozen corn instead of fresh?
Absolutely. Thaw the frozen kernels and pat them dry before adding to the batter. While fresh corn offers a slightly sweeter flavor, frozen corn works well and is convenient year‑round.
Q: How do I prevent the topping from becoming too dry?
Keep the cream cheese mixture slightly soft and avoid over‑baking. Cover the casserole with foil for the first 20 minutes, then uncover to finish browning. This traps moisture while still allowing the crust to develop.
Q: What can I substitute for Jiffy corn muffin mix?
A homemade blend of cornmeal, flour, baking powder, and a pinch of salt works well. Use 1 cup cornmeal, 1 cup all‑purpose flour, 1 tsp baking powder, and ½ tsp salt. Adjust the liquid slightly to achieve a similar batter consistency.
Q: My casserole turned out soggy—what went wrong?
Too much liquid can cause sogginess. Make sure you measure the milk accurately and avoid over‑mixing, which can incorporate excess air and moisture. Also, ensure the oven is fully pre‑heated before baking.
Q: Can I add extra vegetables?
Yes! Diced bell peppers, shredded carrots, or even chopped spinach can be folded into the batter. Add them in moderation to maintain the balance of flavors and avoid excess moisture.
Q: Is it possible to make this recipe ahead of time?
Definitely. Assemble the casserole up to the point of baking, cover tightly, and refrigerate for up to 24 hours. When ready, bake directly from the fridge, adding a few extra minutes to the cooking time.
🎉 To Your Oven!
This Corn Casserole with Cream Cheese Jiffy is a celebration of comfort, flavor, and simplicity. By combining sweet corn, a buttery crumb, and a tangy cream cheese topping, you create a dish that feels both homey and gourmet. Whether you’re feeding a family gathering, a holiday feast, or a casual weeknight dinner, the casserole’s adaptable nature ensures it will shine.
I encourage you to try the base recipe first, then experiment with the variations that suit your taste and dietary needs. Share your results, ask questions, and let the community know how you made it your own. Your feedback helps us all become better cooks.
Have you tried this recipe?
Leave a comment and rating below! Share your photos on Instagram with #CornCasseroleJoy for a chance to be featured.
Corn Casserole with Cream Cheese Jiffy
A buttery, sweet‑savory casserole that’s perfect for any season.
📝 Ingredients
Base
Topping
👨🍳 Instructions
- Prep the corn: Remove husks, slice kernels, and set aside.
- Soften cream cheese: Let sit at room temperature, then beat until smooth.
- Mix batter: Combine Jiffy mix, milk, butter, salt, pepper; fold in corn and cheddar.
- Transfer to dish: Grease a 9‑inch square pan and spread batter evenly.
- Add topping: Spread cream cheese mixture over the batter.
- Bake: Preheat oven to 190°C; bake 30‑35 min until golden.
- Check doneness: Insert a knife; it should come out clean.
- Rest & garnish: Let sit 5 min; sprinkle extra chives.
- Serve: Cut into squares, serve warm with your favorite sides.
- Enjoy: Share with family, friends, and savor every bite!
🥗 Nutritional Information (per serving)
*Values are estimates based on standard ingredient data.
📚 You Might Also Like

Cheesy Broccoli Rice Casserole

Savory Sweet Potato Gratin

Spicy Jalapeño Cornbread


💬 Comments & Reviews
Leave a Comment
No comments yet. Be the first to share your thoughts!