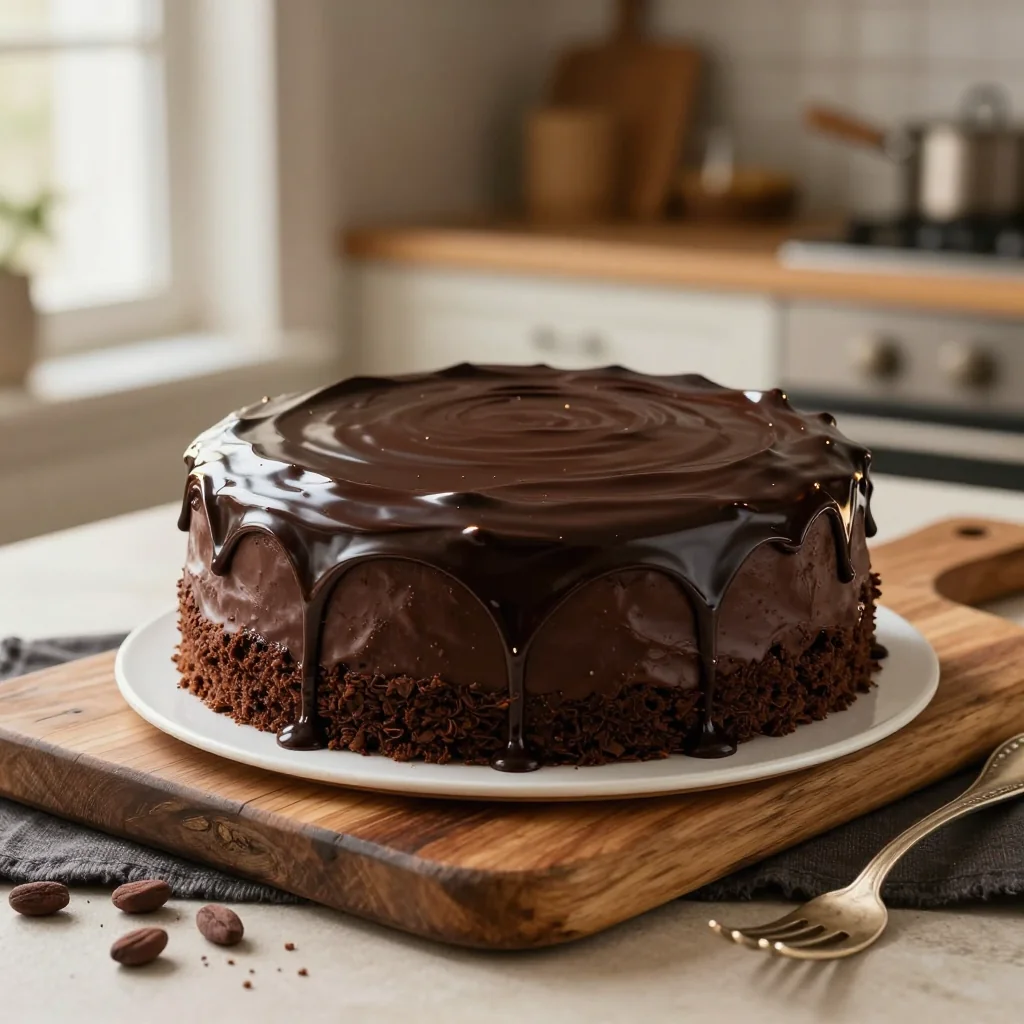
A velvety, ultra‑rich chocolate cake drenched in silky ganache – the ultimate indulgence for any celebration.
When I was ten, my grandmother’s kitchen smelled like a chocolate factory after she pulled a freshly baked chocolate cake from the oven. The moment the dense, glossy ganache dripped over the warm crumb, I felt an instant, unforgettable rush of comfort and joy. That memory has stayed with me, resurfacing every time I need a sweet escape from the hustle of daily life.
This chocolate fudge cake draws inspiration from classic French pâtisserie, yet it embraces the bold, celebratory spirit of a modern dessert bar. The cake’s tender crumb is packed with high‑quality dark chocolate, while the ganache adds a glossy, melt‑in‑your‑mouth richness that makes each bite feel like a small celebration.
In this guide, I’ll walk you through every step—from selecting the perfect cocoa to mastering the ganache’s silky sheen—so you can recreate the magic in your own kitchen. You’ll learn why each ingredient matters, how to avoid common pitfalls, and how to adapt the recipe for dietary needs without sacrificing any of that decadent charm.
Ready to turn your kitchen into a chocolate haven? Let’s get started and make a cake that will wow your family, impress your friends, and become the centerpiece of any gathering.
🌟 Why This Recipe Will Capture Your Heart
There’s something inherently comforting about a chocolate cake that feels both luxurious and home‑made. This recipe blends the best of both worlds, delivering a dessert that’s approachable yet spectacular.
- ✨ Unmatched Moisture: The combination of melted butter and eggs creates a tender crumb that stays moist for days, thanks to the balanced ratio of fat to flour.
- ✨ Deep, Complex Flavor: Using 70% dark chocolate provides a bittersweet depth, while a pinch of sea salt amplifies the chocolate’s natural richness.
- ✨ Silky Ganache Finish: The ganache is a simple 1:1 ratio of chocolate to cream, heated just enough to coat the cake in a glossy, glossy veil that hardens slightly for a perfect snap.
- ✨ Versatile Presentation: Whether you slice it for a formal dinner or serve it as a casual dessert, the cake looks impressive on any platter, especially when garnished with toasted hazelnuts.
- ✨ Easy Scaling: The built‑in portion adjuster lets you increase or decrease servings without re‑calculating each ingredient manually.
- ✨ Crowd‑Pleaser: Its rich chocolate profile satisfies both die‑hard chocoholics and those who prefer a subtler sweetness, making it ideal for parties, holidays, or a simple weekend treat.
🥗 Ingredients
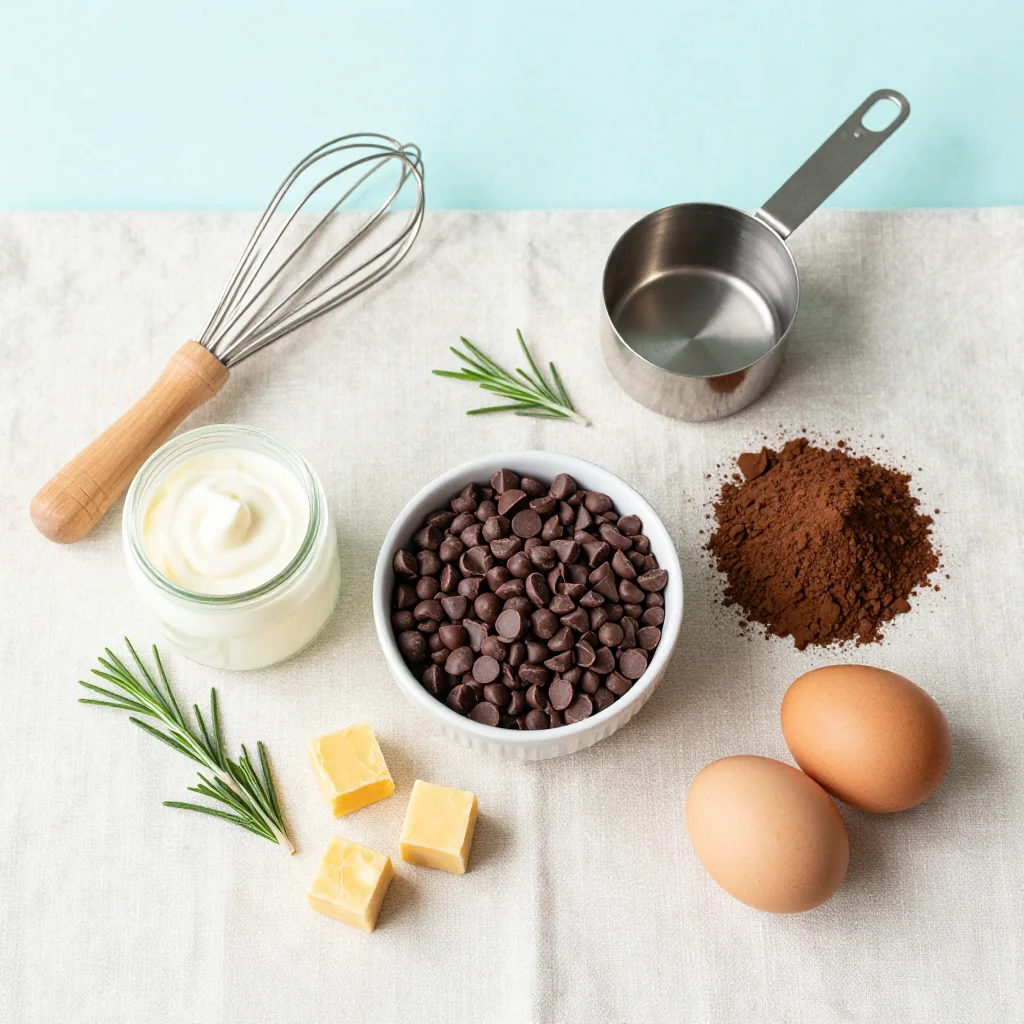
📝 Complete Ingredient List
For the Chocolate Cake:
For the Chocolate Ganache:
For Garnish (optional):
🔍 Focus on Key Ingredients
Dark Chocolate (70% cacao)
Choosing a high‑quality dark chocolate is the cornerstone of this cake. Look for chocolate with at least 70% cocoa solids; this ensures a deep, slightly bitter flavor that balances the sweetness of the sugar. Opt for chocolate that contains minimal additives—pure cocoa butter and cocoa mass create a smoother ganache and a more stable crumb.
Unsalted Butter
Butter contributes both flavor and moisture. Unsalted butter lets you control the salt level precisely, ensuring the final taste isn’t overly salty. For the best texture, melt the butter gently and let it cool slightly before mixing it with the dry ingredients.
Heavy Cream
The cream’s fat content (usually 35% or higher) is essential for a glossy ganache. It adds silkiness and helps the chocolate set with a subtle snap. When heating, keep the cream just below boiling to avoid scorching, which could introduce a burnt note.
🔄 Quick Substitutions
| If you don’t have... | Use instead... |
|---|---|
| Dark chocolate (70%) | Bittersweet chocolate (60‑70%) |
| Unsalted butter | Salted butter (reduce added salt by ¼ tsp) |
| Heavy cream | Half‑and‑half + 2 tbsp melted butter |
👨🍳 Step‑by‑Step Instructions
Follow these detailed steps to create a cake that’s both tender and decadently rich. Take your time with each phase, and remember that patience is the secret ingredient.
📋 Phase 1: Preparation & Mise en Place
Gather all tools and pre‑heat the oven before you begin.
Preheat Oven & Prepare Pan
Set your oven to 175°C (350°F). Grease a 9‑inch (23 cm) round cake pan with butter, then line the bottom with parchment paper. This ensures the cake releases cleanly after baking.
Measure Dry Ingredients
In a large bowl, whisk together flour, cocoa powder, baking powder, baking soda, and sea salt. Whisking aerates the mixture, preventing clumps and ensuring even distribution of leavening agents.
Melt Chocolate & Butter
Combine the chopped dark chocolate and melted butter in a heat‑proof bowl over a pot of simmering water (bain‑marie). Stir gently until smooth, then remove from heat and let it cool slightly.
🔥 Phase 2: Baking & Ganache Assembly
Combine wet and dry components, then bake to perfection.
Combine Wet Ingredients
In a separate bowl, beat the sugar and eggs together until the mixture lightens in color and becomes fluffy (about 3‑4 minutes). Add vanilla extract and the slightly cooled chocolate‑butter mixture, whisking until fully incorporated.
Fold in Dry Ingredients
Gently fold the dry ingredient mixture into the wet batter using a spatula. Stop once the flour disappears; the batter should be thick but pourable. Over‑mixing can develop gluten, making the cake dense.
Bake the Cake
Pour the batter into the prepared pan, smoothing the top with a spatula. Bake for 30‑35 minutes, or until a toothpick inserted in the center comes out with a few moist crumbs. The cake should spring back lightly when touched.
✨ Phase 3: Finishing Touches & Serving
Prepare the ganache, assemble, and present.
Prepare Ganache
While the cake cools, heat the heavy cream in a saucepan until it begins to simmer. Remove from heat and pour over the chopped chocolate and butter. Let sit for 2 minutes, then whisk until glossy. If using, stir in golden syrup for a subtle caramel note.
Cool & Unmold
Allow the cake to cool in the pan for 10 minutes, then run a thin knife around the edges and invert onto a wire rack. Let it cool completely before glazing; a warm cake will melt the ganache unevenly.
Glaze with Ganache
Place the cooled cake on a serving plate. Pour the ganache over the top, allowing it to cascade down the sides. Use a spatula to smooth any excess, creating a glossy, mirror‑like finish.
Garnish & Serve
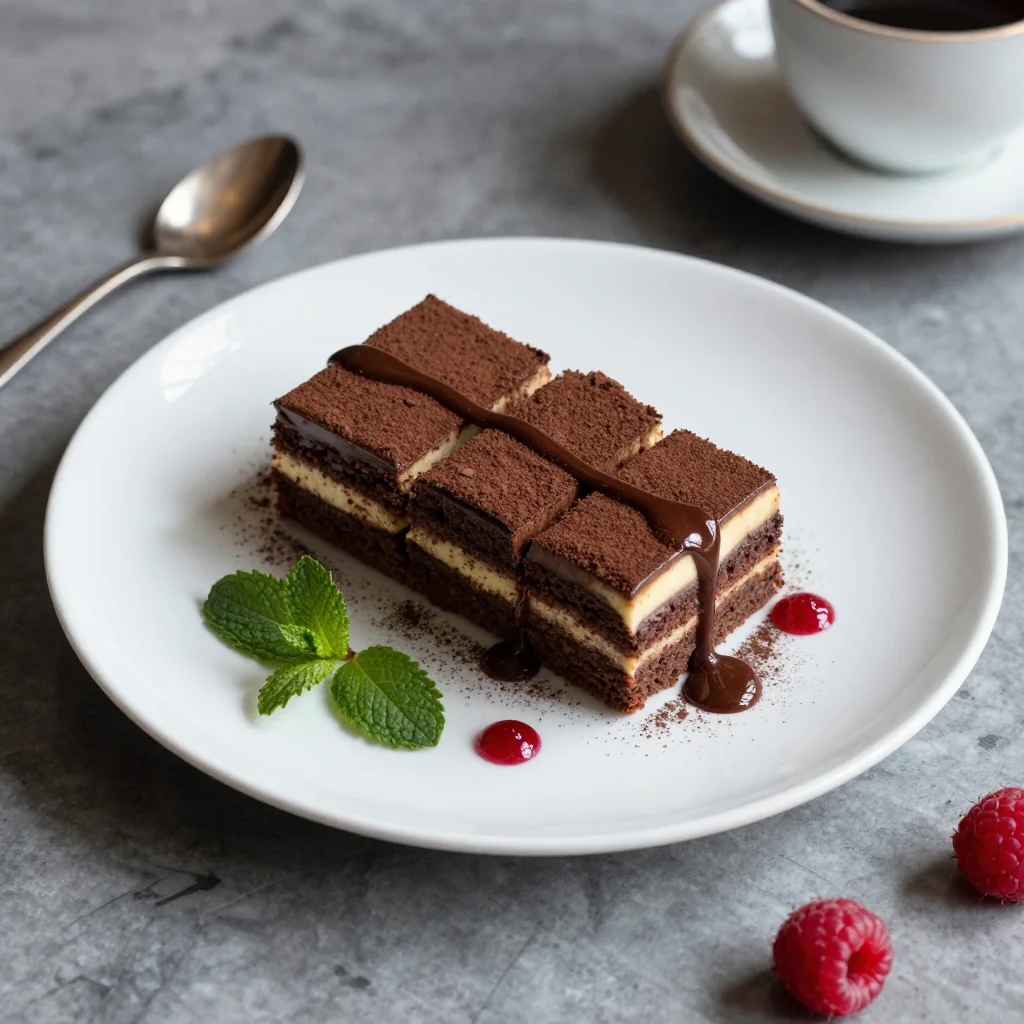
Scatter toasted hazelnuts and fresh berries over the ganache for texture and color contrast. Slice with a warm knife for clean cuts. Serve at room temperature, paired with a glass of ruby red wine or a robust espresso.
💡 Expert Tips & Tricks
🛒 Choosing the Right Ingredients
When shopping for chocolate, look for a bar that lists cocoa mass and cocoa butter as the first two ingredients. Avoid chocolates with vegetable oils or excess sugar, as they can produce a grainy ganache. For butter, opt for European‑style butter with a higher butterfat content (82‑84%) for richer flavor. Fresh eggs at room temperature blend more easily, giving a smoother batter.
🔪 Preparation Techniques
Before mixing, sift the flour and cocoa powder together to eliminate lumps. This also aerates the mixture, helping the cake rise evenly. When melting chocolate, keep the water bath temperature low (no more than 45°C) to prevent the chocolate from seizing. Use a silicone spatula for folding to preserve air bubbles.
🌡️ Mastering the Bake
Invest in an oven thermometer; many home ovens run hotter than the dial indicates. Bake the cake on the middle rack to ensure even heat distribution. If the top begins to darken before the center is cooked, loosely cover with aluminum foil to prevent over‑browning.
🍽️ Presentation & Service
For a polished look, chill the ganache slightly before glazing; this creates a smoother surface. Use a cake stand with a mirrored base to reflect the glossy ganache, enhancing visual appeal. Serve each slice with a dollop of lightly sweetened whipped cream to balance the richness.
🏆 Pro Secrets
Elevate this cake from excellent to restaurant‑level with a few scientific tweaks.
- 🎯 Precise Temperature Control: Heat the cream to exactly 85°C before pouring over chocolate. This temperature melts the chocolate crystals perfectly, creating a glossy, stable ganache that sets without streaks.
- 🎯 Ingredient Scaling Accuracy: Use a digital scale for all dry ingredients. Even a 5‑gram variance in flour can affect crumb texture, especially when scaling the recipe up or down.
- 🎯 Resting the Batter: Let the batter rest for 10 minutes after mixing. This allows the flour to fully hydrate, resulting in a softer crumb and reduced gluten development.
- 🎯 Use of an Inverted Baking Sheet: Placing the cake pan on an inverted baking sheet (upside‑down) helps distribute heat evenly, preventing a domed top.
- 🎯 Ganache Tempering: After the ganache reaches a smooth sheen, let it cool to 30°C before glazing. This ensures a firm set without a waxy texture.
- 🎯 Finishing Salt Crystals: Sprinkle a pinch of flaky sea salt just before serving; the contrast heightens the chocolate’s depth and adds a subtle crunch.
“Chocolate is a perfect food, it’s a perfect ingredient. It’s a perfect pleasure.” — Jacques Torres
🔄 Variations & Adaptations
The core of this recipe is versatile. Below are ideas to tailor it to dietary needs, flavor cravings, or seasonal twists.
🥬 Vegetarian / Vegan Version
Swap the eggs for a flax‑egg mixture (1 tbsp ground flaxseed + 3 tbsp water per egg) and use a plant‑based butter alternative. Replace dairy cream with full‑fat coconut cream for a tropical twist. The ganache will retain its silky texture while staying completely vegan.
- Flax‑egg substitution: Mix, let sit 5 minutes, then add to batter.
- Coconut cream: Chill a can, scoop the solidified cream, and melt gently.
🌶️ Flavor Variations
Experiment with complementary flavors to keep the experience fresh.
Spicy Version:
Add ½ tsp of cayenne pepper to the dry ingredients and a dash of smoked paprika to the ganache for a subtle heat that pairs beautifully with the chocolate.
Mediterranean Version:
Incorporate finely chopped pistachios into the ganache and sprinkle with a pinch of rose water for an exotic aroma.
Asian Fusion Version:
Stir in 1 tbsp of miso paste into the ganache for umami depth, and garnish with toasted sesame seeds and thin slices of fresh ginger.
⚠️ Dietary Adaptations
Gluten‑Free:
Replace all‑purpose flour with a 1:1 gluten‑free flour blend that includes xanthan gum. The texture remains tender.
Lactose‑Free:
Use lactose‑free butter and coconut cream. Ensure the chocolate is dairy‑free (some dark chocolates contain milk solids).
Low‑Calorie:
Reduce sugar by 30 % and substitute half the butter with unsweetened applesauce. The ganache can be lightened by using half‑and‑half instead of full‑fat cream.
👶 Family / Kids Version
For younger palates, lower the cocoa content to 50 % dark chocolate and add a swirl of caramel or peanut butter into the batter before baking. Serve with a drizzle of vanilla yogurt for a playful, kid‑friendly dessert.
📦 Storage & Reheating
🧊 Conservation
In the Refrigerator:
- Duration: 5 days
- Recommended container: airtight cake dome
- Tip: Place a sheet of parchment between the ganache and the lid to prevent moisture buildup.
In the Freezer:
- Duration: 2 months
- Method: Wrap the cake tightly in plastic wrap, then in foil.
- Defrosting: Transfer to the refrigerator overnight, then bring to room temperature before glazing.
💡 For best flavor, consume within a week of baking; the ganache may develop a slight graininess after extended freezing.
♨️ Reheating
🔥 Oven (Recommended):
- Preheat to 150°C (300°F).
- Cover the cake loosely with aluminum foil.
- Heat for 10‑12 minutes.
- Remove foil and heat an additional 3‑4 minutes to revive the ganache’s sheen.
⚡ Microwave (Quick):
- Place a slice on a microwave‑safe plate.
- Cover with a microwave‑safe lid.
- Heat on medium power for 30 seconds, then check.
- Repeat in 10‑second bursts if needed.
🍳 Stovetop:
For individual slices, gently warm in a non‑stick skillet over low heat, covering the pan to trap steam. This method restores softness without drying the ganache.
🍷 Perfect Pairings
🥗 Side Dishes
- Fresh Mixed Berries: Their natural acidity cuts through the richness, refreshing the palate.
- Light Citrus Salad: A salad of orange segments, mint, and a drizzle of honey offers a bright contrast.
- Whipped Mascarpone: A dollop adds creaminess without overwhelming the chocolate.
🍷 Wine & Drink Pairings
- Ruby Port: Its sweet, fortified character mirrors the cake’s depth.
- Cabernet Sauvignon: The wine’s tannins balance the chocolate’s bitterness.
- Non‑Alcoholic: Sparkling pomegranate juice adds a festive, tart note.
🍰 Complementary Courses
Start with a light citrus sorbet to cleanse the palate, follow with the chocolate fudge cake, and finish with a vanilla bean crème brûlée. The progression moves from bright to rich and back to silky, creating a balanced dining experience.
❓ Frequently Asked Questions
Q: Can I use milk chocolate instead of dark chocolate?
A: Yes, but expect a sweeter, less intense flavor. To retain some bitterness, substitute half of the dark chocolate with milk chocolate and add a pinch of espresso powder.
Q: How do I prevent the ganache from becoming grainy?
A: The key is temperature control. Heat the cream to just below boiling (around 85°C) and pour it over finely chopped chocolate. Stir gently until fully melted. Avoid overheating, which can cause the chocolate to seize.
Q: My cake collapsed in the middle—what went wrong?
A: Over‑mixing the batter or opening the oven too early can cause a collapse. Ensure you fold the dry ingredients just until combined and keep the oven door closed for the first 20 minutes of baking.
Q: Can I make this cake gluten‑free?
A: Absolutely. Use a 1:1 gluten‑free flour blend that contains xanthan gum. The texture will stay tender, and the ganache will still set perfectly.
Q: How long can the ganache be stored separately?
A: Ganache can be kept in an airtight container in the refrigerator for up to a week. Warm gently before using it as a glaze.
Q: Is it possible to prepare the cake a day ahead?
A: Yes. Bake the cake, let it cool completely, and store it wrapped in plastic wrap. Add the ganache the next day for a fresh, glossy finish.
🎉 To Your Oven!
Crafting this Chocolate Fudge Cake with Ganache is a rewarding journey that blends technique with indulgence. The result is a cake that stays moist, boasts a glossy ganache, and offers a flavor profile that feels both familiar and extraordinary. Whether you’re celebrating a milestone or simply craving a decadent treat, this recipe delivers every time.
Remember, the beauty of this cake lies in its adaptability—tweak the chocolate intensity, experiment with spices, or adjust the portion size with the built‑in calculator. I can’t wait to see how you make it your own!
Have you tried this recipe?
Leave a comment and rating below! Share your photos on Instagram with #FudgeCakeFiesta to be featured.
Chocolate Fudge Cake with Ganache
A velvety chocolate cake drenched in silky ganache – perfect for celebrations.
📝 Ingredients
Chocolate Cake
Chocolate Ganache
Garnish (optional)
👨🍳 Instructions
- 1 Preheat the oven to 175°C (350°F) and prepare a 9‑inch round cake pan with butter and parchment.
- 2 Whisk together flour, cocoa powder, baking powder, baking soda, and sea salt in a large bowl.
- 3 Melt dark chocolate and butter over a bain‑marie, then let cool slightly.
- 4 Beat sugar and eggs until fluffy, add vanilla and the chocolate‑butter mixture.
- 5 Fold the dry ingredients into the wet batter just until combined.
- 6 Bake for 30‑35 minutes, checking with a toothpick for moist crumbs.
- 7 Heat cream to a gentle simmer, pour over chopped chocolate and butter for ganache, whisk until smooth.
- 8 Cool the cake completely, then unmold.
- 9 Pour ganache over the cake, letting it cascade down the sides.
- 10 Garnish with hazelnuts and berries, slice, and serve.
🥗 Nutrition (per serving)
*Values are estimates based on standard ingredient data.
📚 You Might Also Like
Classic Tiramisu
Lemon Blueberry Cheesecake
Salted Caramel Brownies
💬 Comments & Reviews
Leave a Comment