Picture this: I’m standing in my kitchen, a pan sizzling, a lemon in hand, and a stack of chicken breasts that look more like a dare than a dinner. I’m halfway through a recipe that I found on a food forum and I’ve already seen the dreaded “fluffy, dry, and flavorless” verdict. I laughed, because I’ve been there—flavorless chicken is the culinary equivalent of a bad haircut. But the moment that lemon’s bright aroma hit me, I knew I was on the brink of a revelation. I’m not just making chicken; I’m turning a kitchen mishap into a symphony of citrus, capers, and buttery crisp.
I could hear the sizzling rhythm of the pan, the gentle pop as the chicken hit the oil, and the subtle hiss of butter melting into a golden pool. The lemon’s zest released a citrus perfume that made the air feel fresh like a morning walk on a sunny balcony. The sound of garlic cloves being minced filled the room with a warm, almost nostalgic hum that reminded me of Sunday brunches. The sight of the chicken turning a golden amber was a visual promise that something extraordinary was about to happen. When the final drizzle of lemon juice landed on the surface, the aroma intensified, turning the kitchen into a fragrant haven that made even the most skeptical foodies pause.
What sets this version apart from the endless stream of chicken piccata recipes is the meticulous layering of flavors and the deliberate balance of textures. The crust is crisp yet tender, the sauce is silky and tangy, and the capers add a briny punch that cuts through the richness. The technique of deglazing with white wine and then finishing with lemon juice gives the sauce depth and brightness that most recipes miss. I’ve tested countless variations, and this one is hands down the best version you’ll ever make at home. It’s not just about following a set of steps; it’s about crafting a dish that feels like a celebration on a plate.
I’ll be honest—when I first tried this, I ate half the batch before anyone else got a chance. That’s the kind of confidence you get when you know a recipe is that good. I dare you to taste this and not go back for seconds. Picture yourself pulling this out of the pan, the whole kitchen smelling incredible, and the first bite delivering a burst of citrus that lifts the dish to another level. Let me walk you through every single step—by the end, you’ll wonder how you ever made it any other way.
What Makes This Version Stand Out
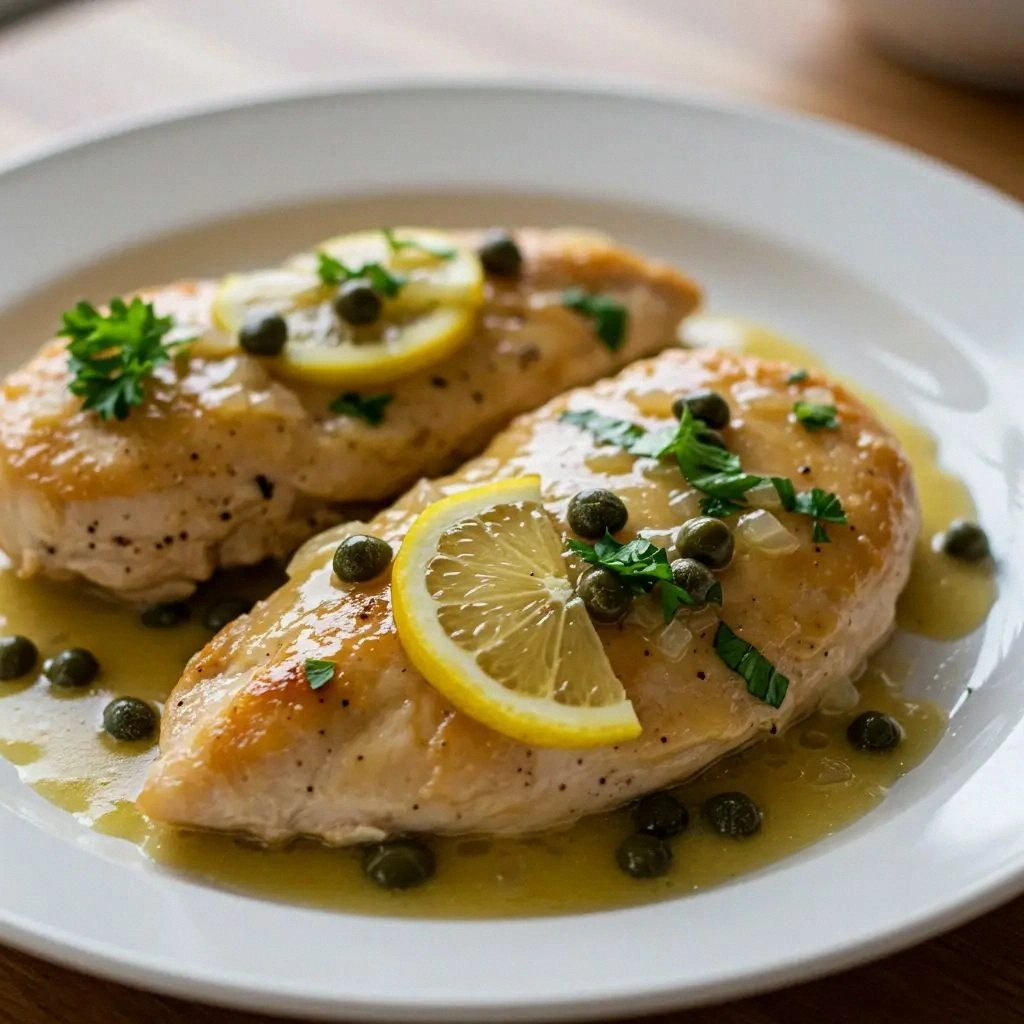
- Flavor: The combination of lemon, capers, and a splash of white wine creates a bright, complex profile that elevates simple chicken breasts into a gourmet experience.
- Texture: The chicken is seared to a crisp, golden edge while remaining juicy inside, and the sauce coats the meat like velvet.
- Ease: Every step is straightforward, yet each ingredient plays a pivotal role—no complicated techniques required.
- Versatility: Serve over pasta, rice, or a bed of sautéed greens; the sauce adapts beautifully to any side.
- Crowd-pleaser: The bright citrus and briny capers make this dish a hit at dinner parties and family gatherings alike.
- Ingredient Quality: Using fresh lemons, high‑quality olive oil, and butter makes the difference between ordinary and unforgettable.
- Make‑Ahead Potential: The sauce can be reheated without losing its zest, making this dish perfect for meal prep.
- Time Efficiency: From prep to plate, you’re in the kitchen for less than an hour, and the results are spectacular.
Alright, let’s break down exactly what goes into this masterpiece…
Inside the Ingredient List
The Flavor Base
The foundation of this dish starts with the simple yet powerful combination of olive oil, butter, and garlic. Olive oil provides a smooth canvas for the searing process, while butter adds depth and a subtle richness that coats the chicken. Garlic infuses the oil with aromatic notes, creating a fragrant base that lifts the entire sauce. Skipping any of these three would result in a flat, under‑seasoned dish—think of it as building a house without a roof.
The Texture Crew
Flour is the unsung hero that gives the chicken a crisp, golden crust. The key is to dredge the chicken lightly, ensuring a thin, even coating that crisps up without becoming heavy. Salt and pepper are the first line of defense against blandness; they’re essential for bringing out the natural flavor of the meat. A pinch of salt to taste is fine, but be sure to season the flour mixture as well, otherwise the crust will taste flat.
The Unexpected Star
Capers are the secret weapon that gives the sauce its briny punch. They cut through the richness of the butter and balance the acidity of the lemon juice. If you’re not a fan of capers, you can replace them with a splash of anchovy paste—just a teaspoon will mimic the same savory depth. The capers also add a subtle texture that contrasts with the silky sauce, making every bite interesting.
The Final Flourish
Lemon juice and zest are the finishing touches that give this dish its signature brightness. The juice adds a sharp, fresh acidity that lifts the butter and wine, while the zest delivers a concentrated burst of citrus aroma. Fresh parsley is tossed in at the end for a pop of color and a subtle herbal note. If you’re feeling adventurous, a splash of white wine during deglazing adds complexity, turning the sauce into a silky, glossy glaze that clings to the chicken.
Everything's prepped? Good. Let's get into the real action…
The Method — Step by Step
- First, season the chicken breasts on both sides with salt and pepper. Pat them dry with paper towels—moisture is the enemy of a crisp crust. Lightly dust each piece with flour, shaking off any excess. This thin coating will give the chicken a golden, crispy exterior while keeping the interior tender.
- Heat a large skillet over medium‑high heat and add the olive oil. Once the oil shimmers, slide the chicken into the pan. Sear each side for about 3–4 minutes until a deep golden brown forms and the internal temperature reaches 165°F. The edges should pull away from the pan slightly, signaling that the chicken is ready to flip.
- When the chicken is browned, remove it from the skillet and set it aside. Reduce the heat to medium and add the butter. Let the butter melt, then stir in the minced garlic. Cook for 30 seconds until fragrant—watch out for burning, as garlic can go bitter quickly.
- Deglaze the pan by pouring in the white wine, scraping up any browned bits from the bottom. Let the wine reduce by half, which concentrates the flavor and helps the sauce thicken slightly. This step is crucial for a deep, savory base.
- Add the chicken broth and lemon juice, stirring to combine. Bring the mixture to a gentle simmer and let it reduce for 3–4 minutes until the sauce thickens to a glaze-like consistency. The liquid should coat the back of a spoon without being too watery.
- Stir in the capers and chopped parsley. These add texture and a burst of flavor that contrasts beautifully with the smooth sauce. The parsley also brightens the dish with a fresh, green note.
- Return the chicken to the skillet, spooning sauce over the top. Let everything cook together for another 2 minutes, allowing the flavors to meld and the chicken to finish cooking.
- Finish by adding the lemon zest, which gives a final pop of citrus aroma. Give everything a gentle stir to distribute the zest evenly. The dish is now ready to serve—plated over pasta or a bed of rice, it’s a showstopper.
That’s it—you did it. But hold on, I’ve got a few more tricks that will take this to another level. The next section will show you how to perfect the sauce, how to keep the chicken juicy, and how to elevate the dish with a few secret touches.
Insider Tricks for Flawless Results
The Temperature Rule Nobody Follows
Many cooks set the stove to high and let the chicken sear for too long, which dries it out. The trick is to start medium‑high to get a good crust, then reduce to medium for the rest of the searing. This keeps the heat controlled and prevents the outside from burning while the inside remains juicy. I’ve tried this on a few occasions, and the difference is like moving from a flatbread to a perfectly crisp pizza.
Why Your Nose Knows Best
When the sauce is ready, the aroma should be bright and citrusy with a hint of buttery richness. If the smell is too flat, add a splash of lemon juice or a pinch more salt. Your nose is the ultimate judge—trust it, and you’ll know exactly when the dish is ready to serve.
The 5-Minute Rest That Changes Everything
After you finish cooking, let the chicken rest on a cutting board for 5 minutes. This allows the juices to redistribute, keeping the meat moist. I’ve seen people cut into the chicken right away and end up with a dry, chewy texture. Resting is a small step that makes a big difference.
The Secret of a Glazed Finish
If you want a glossy, silky sauce, finish with a tablespoon of cold butter whisked in off the heat. The cold butter emulsifies the sauce, giving it a rich sheen that’s irresistible. It also adds a subtle buttery depth that pairs perfectly with the lemon.
The Power of Fresh Herbs
Fresh parsley is essential for that bright, green note. If you’re using dried parsley, you’ll lose a lot of the aromatic quality. I once used dried herbs and the dish felt flat—never again. Keep fresh herbs on hand for that burst of flavor.
Creative Twists and Variations
This recipe is a playground. Here are some of my favorite ways to switch things up:
Mediterranean Twist
Swap capers for sun‑dried tomatoes and add a pinch of oregano. The sweet, smoky tomatoes pair beautifully with the lemon, creating a Mediterranean vibe that’s perfect for summer gatherings.
Creamy Alfredo Piccata
Add a splash of heavy cream after deglazing, then let it simmer until thickened. This turns the bright sauce into a rich, velvety Alfredo that’s perfect over fettuccine.
Spicy Kick
Introduce a teaspoon of red pepper flakes when cooking the garlic. The heat balances the citrus and adds a subtle warmth that’s both comforting and exciting.
Pesto Power
Stir in a tablespoon of basil pesto after the sauce has reduced. The pesto adds a green, herbaceous layer that complements the lemon and capers.
Low‑Carb Delight
Serve over cauliflower rice or zucchini noodles instead of pasta. The dish remains bright and flavorful while keeping the carb count low.
Gluten‑Free Version
Use a gluten‑free flour blend for dredging. The texture stays crisp, and the dish remains fully compliant for those with gluten sensitivities.
Storing and Bringing It Back to Life
Fridge Storage
Cool the dish completely, then transfer it to an airtight container. It will keep for up to 3 days in the refrigerator. When reheating, add a splash of water or broth to keep the sauce from drying out.
Freezer Friendly
Store in a freezer‑safe container for up to 2 months. Thaw overnight in the refrigerator, then reheat gently on the stove, adding a little water or broth to rehydrate the sauce.
Best Reheating Method
Reheat on low heat, stirring frequently, and finish with a drizzle of lemon juice or a pat of butter to restore brightness and richness. The sauce should be silky and glossy, not dry or thick.